Categories
Miscellanea

Get a daily report of unanswered emails from actual humans, using Gemini

TL;DR A Google Apps Script runs every morning, grabs the last 24 hours of email, asks Gemini which messages were written by real people who actually expect a reply, and sends me a short report. No keyword guessing: the model reads the content and decides.

My inbox, like everyone’s, is mostly noise: newsletters, platform notifications, receipts, “your invoice is ready”. Buried in there are the few emails written by actual humans who are waiting for an answer, and those are exactly the ones that tend to slip through.

(All addresses and names in this post are placeholders.)

Asking Gemini directly (and why it’s not enough)

If you enable the Google Workspace extension in the Gemini app, you can prepend @Gmail to a request and query your mailbox directly:

@Gmail find the emails I haven't replied to

It works for one-off queries, but it has two problems: the on-demand search isn’t great at telling a real person from a platform pretending to be one, and — more importantly — you can’t schedule it. There is no “send me this report every morning” option.

So I moved the logic to Google Apps Script, which can run on a daily timer, and delegated the “smart” part to Gemini.

The idea: fuzzy filtering

Instead of trying to guess with keywords or sender filters, the script sends an excerpt of each email to Gemini and lets it decide whether it looks like a human asking for something. The model picks up on context — a personal tone, an explicit request, or conversely an automated notification dressed up as normal text.

The flow:

  1. Collect emails from the last 24 hours, skipping threads where the last message is mine (already replied).
  2. Extract a snippet of each body.
  3. Send everything to Gemini with a prompt that asks for JSON only: the ids of the emails worth replying to, and why.
  4. Build the report and email it to me.

Step 1 — Get a (free) API key

Go to aistudio.google.com, then Get API Key → Create API Key and copy it.

Step 2 — Store the key in script properties

Create a new project on script.google.com, then go to the gear icon → Project Settings, scroll down to Script Properties and add a property named GEMINI_KEY with your key as the value. This way the key never appears in the code itself.

Step 3 — The code

function sendEmailRecapWithGemini() {
  const REPORT_RECIPIENT = "[email protected]";
 
  // 1. Emails from the last 24 hours
  const query = "newer_than:1d";
  const threads = GmailApp.search(query);
  if (threads.length === 0) {
    Logger.log("No new email in the last 24 hours.");
    return;
  }
 
  const emailsToAnalyze = [];
 
  for (let i = 0; i < threads.length; i++) {
    const thread = threads[i];
    const messages = thread.getMessages();
    const lastMessage = messages[messages.length - 1];
 
    // Skip if I already replied (last message in the thread is mine)
    const sender = lastMessage.getFrom();
    if (sender.includes(GmailApp.getAliases()[0]) ||
        sender.includes(Session.getActiveUser().getEmail())) {
      continue;
    }
 
    // Body excerpt, to stay within token limits
    const bodyText = lastMessage.getPlainBody().substring(0, 1500);
 
    emailsToAnalyze.push({
      id: i,
      sender: sender,
      subject: lastMessage.getSubject(),
      excerpt: bodyText,
      link: thread.getPermalink()
    });
  }
 
  if (emailsToAnalyze.length === 0) {
    Logger.log("No pending emails after preliminary checks.");
    return;
  }
 
  // 2. The fuzzy prompt
  const prompt = `Act as an extremely smart personal assistant. Analyze this list of emails received in the last 24 hours.
Your only goal is to identify ONLY the emails written by real people (clients, colleagues, partners, friends) that require a reply, an action or my attention.
 
Strictly exclude:
- News, update or marketing newsletters.
- Automated transactional emails (purchase receipts, booking confirmations, platform notifications, system alerts).
- Social notifications or generic messages from commercial bots.
 
For each email you genuinely believe requires a human reply, fill in this JSON schema. Reply EXCLUSIVELY with valid JSON, no text before or after:
[
  {
    "id": ,
    "reason": ""
  }
]
 
Here is the list of emails to analyze:
${JSON.stringify(emailsToAnalyze, null, 2)}`;
 
  // 3. Calling Gemini
  let selectedEmails = [];
  try {
    const apiKey = PropertiesService.getScriptProperties().getProperty("GEMINI_KEY");
    if (!apiKey) {
      Logger.log("Error: GEMINI_KEY not found in script properties.");
      return;
    }
 
    const url = `https://generativelanguage.googleapis.com/v1beta/models/gemini-1.5-flash:generateContent?key=${apiKey}`;
 
    const payload = {
      contents: [{ parts: [{ text: prompt }] }],
      generationConfig: { responseMimeType: "application/json" } // forces clean JSON
    };
 
    const response = UrlFetchApp.fetch(url, {
      method: "POST",
      contentType: "application/json",
      payload: JSON.stringify(payload),
      muteHttpExceptions: true
    });
 
    const jsonResponse = JSON.parse(response.getContentText());
    if (jsonResponse.candidates && jsonResponse.candidates[0].content.parts[0].text) {
      const modelText = jsonResponse.candidates[0].content.parts[0].text;
      selectedEmails = JSON.parse(modelText);
    } else {
      Logger.log("Unexpected response from Gemini: " + response.getContentText());
      return;
    }
  } catch (error) {
    Logger.log("Error while calling Gemini: " + error);
    return;
  }
 
  // 4. The final report
  if (selectedEmails && selectedEmails.length > 0) {
    let body = "Hi,\n\nGemini went through the mailbox and isolated these emails from real people waiting for a reply:\n\n";
    selectedEmails.forEach((sel, idx) => {
      const e = emailsToAnalyze.find(x => x.id === sel.id);
      if (e) {
        body += `${idx + 1}. From: ${e.sender}\n   Subject: ${e.subject}\n   Context: ${sel.reason}\n   Reply: ${e.link}\n\n`;
      }
    });
    GmailApp.sendEmail(
      REPORT_RECIPIENT,
      `[Smart Report] ${selectedEmails.length} emails to reply to`,
      body
    );
    Logger.log("Smart report sent.");
  } else {
    Logger.log("No human emails to report today.");
  }
}

Step 4 — Schedule the daily run

To have the script run by itself every morning:

  1. In the Apps Script editor, click the clock icon (Triggers) in the left sidebar.
  2. Bottom right, + Add Trigger.
  3. Function to run: sendEmailRecapWithGemini. Event source: time-driven. Type: day timer. Time of day: whatever suits you (I use 7–8 AM, so the report is waiting for me at the start of the day).
  4. Save and grant the requested permissions (Gmail access and sending email on your behalf). If you get the “unverified app” warning, click Advanced → Open [project name].

From then on, Google runs the script daily and the report shows up in your inbox.

Notes

  • Cost/limits: gemini-1.5-flash through AI Studio has a generous free tier; if you receive a lot of email, keep an eye on the quota.
  • Privacy: you are sending excerpts of your email to Google’s AI Studio APIs. Something to keep in mind if you deal with sensitive content.
  • Time window: newer_than:1d looks at the last 24 hours; align it with the trigger time to avoid missing or duplicating messages.
  • False positives/negatives: this is a reminder, not a ticketing system. Tweak the prompt (exclusions, tone) based on the patterns of your actual mailbox.
  • “Already replied” detection relies on the last message in the thread being yours; replies sent outside Gmail won’t be seen.
Categories
Miscellanea

Tesla Wall Connector: Germany §14a EnWG Curtailment as a crude power limiter

Tesla’s Wall Connector is a reasonable choice for a wall box in the EU market. A single, relatively inexpensive product (535 euro in Italy) can work on both single- and three-phase systems and can handle up to 22 kW charging.

Though an additional Neurio Meter (which to my knowledge is no longer sold by Tesla) can enable dynamic load balancing (e.g. you can limit the total amount of power your house can draw by limiting EV charging), a lesser known feature can come in handy. Germany’s §14a EnWG Curtailment regulation requires power-hungry devices to be able to be deactivated or brought to under 6A per phase by the power company. Tesla’s Wall Connector complies with such regulation and allows using the RS485 connection on the unit to be used as a dry contact to enable/disable curtailing.

Wiring and configuration

To enable the device’s hotspot required for configuration, you can either turn the power off and then on again, or you can press and hold the button on the charger’s handle until the lights on the unit start blinking.

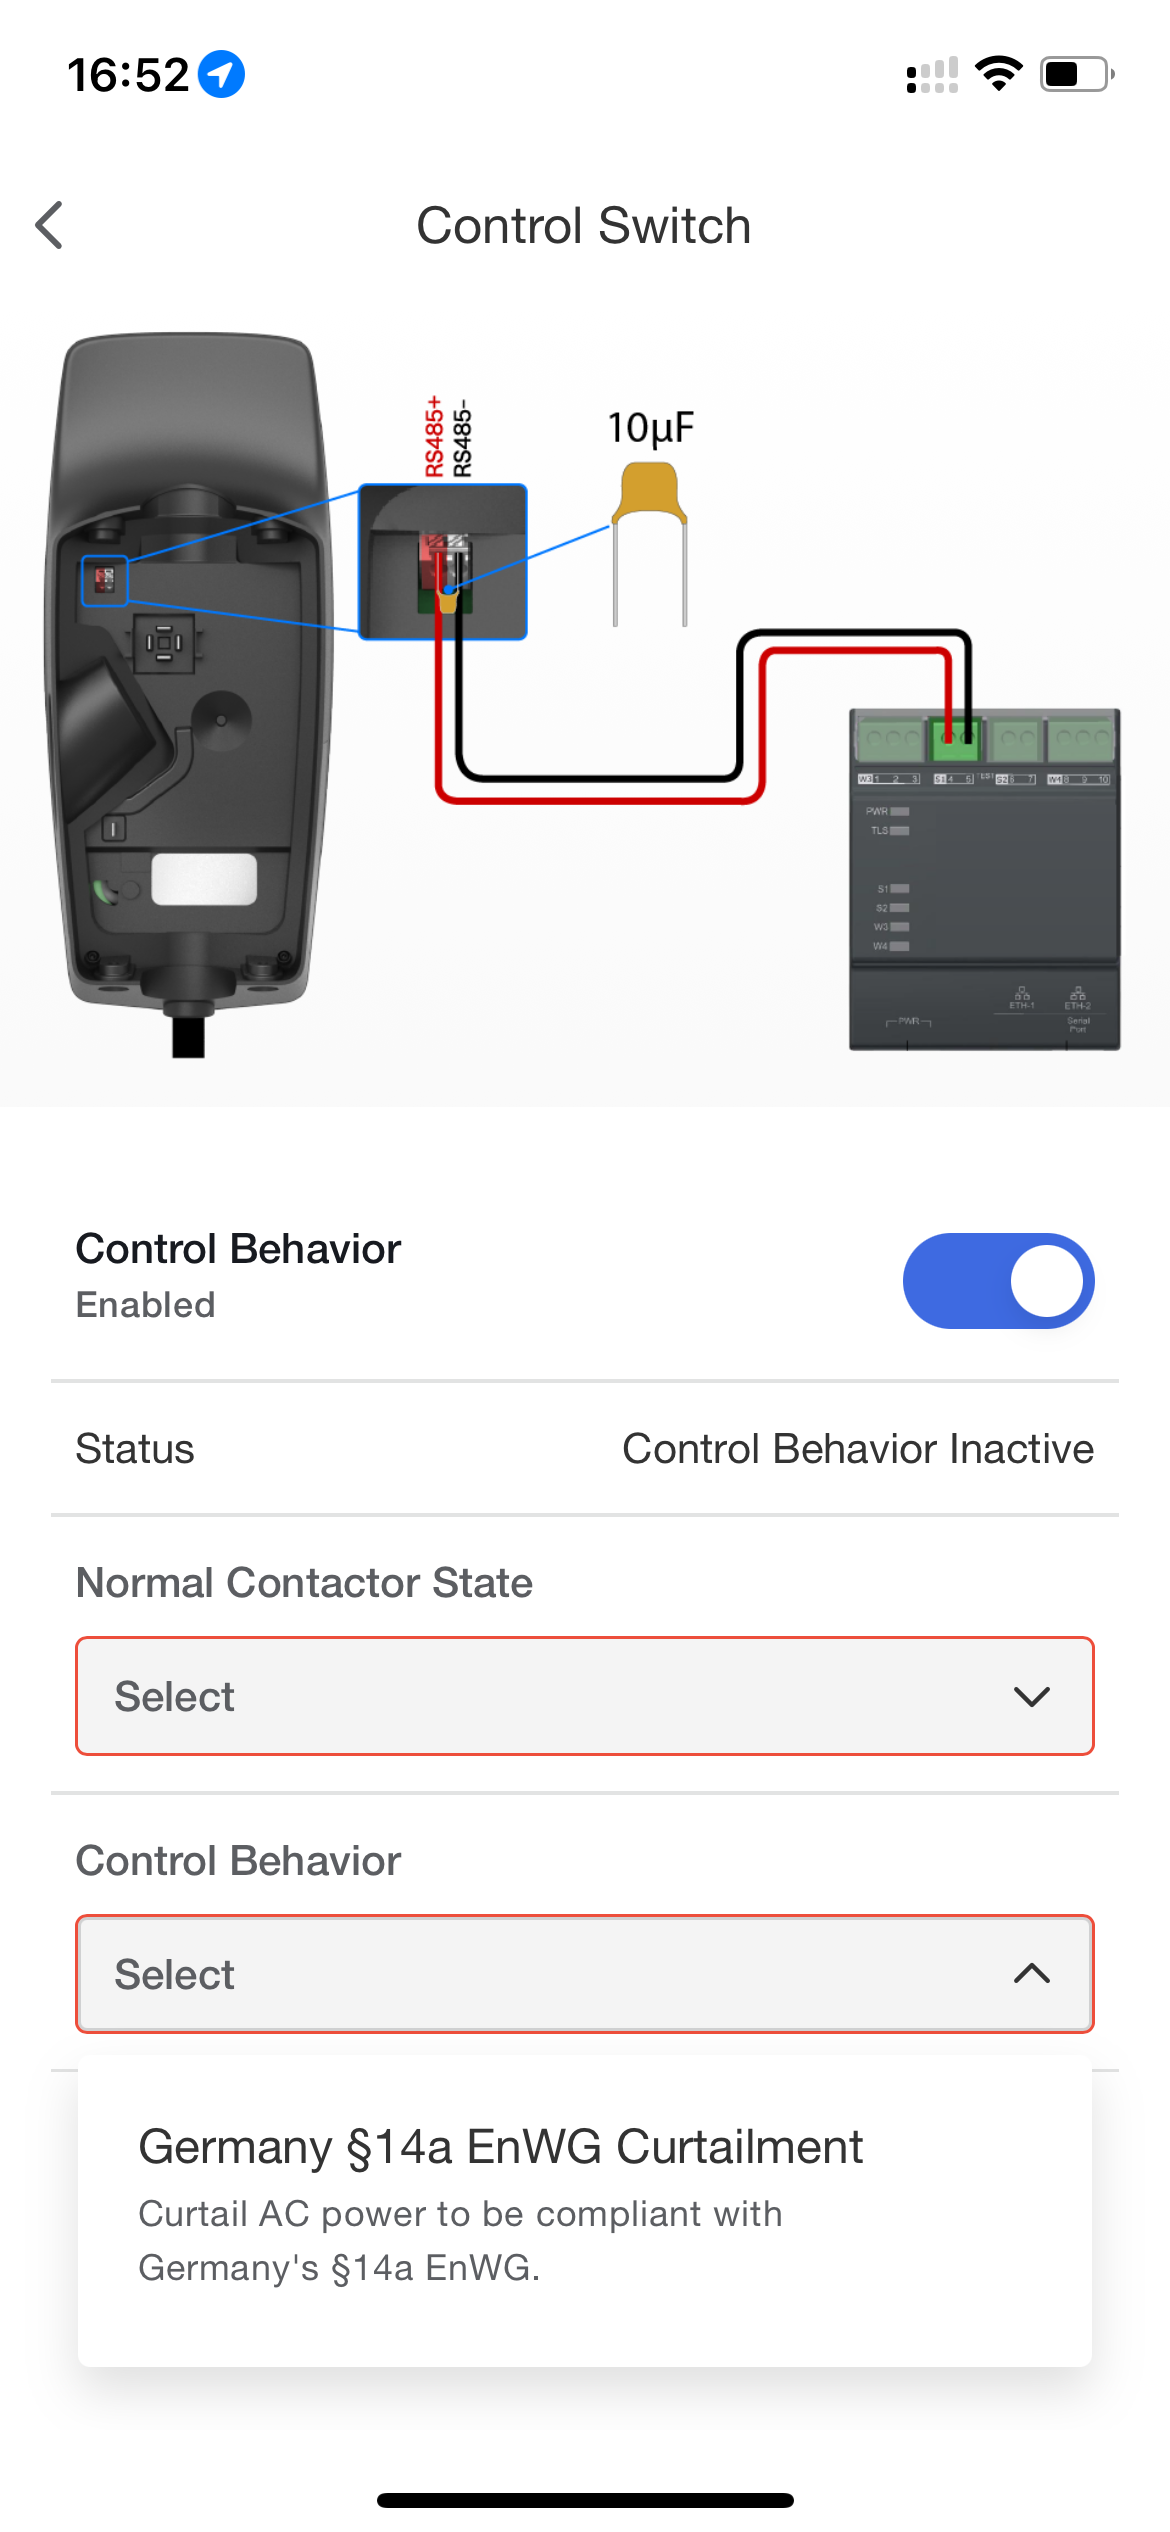
Screenshot of the Tesla One app showing the control switch configuration
As shown in the Tesla One app screenshot above, you need to place a 10µF capacitor across the RS485 terminals, and then wire your relay/switch to them. You can use the Tesla One app to configure the contactor state to be either normally open (open circuit = no power limit) or normally closed (open circuit = limiter active).

Results

After saving your configuration, by toggling the relay/switch you can either let the car draw the current it wants up to the charger’s limit (adjustable in Tesla One, up to 32A) or limit it to 6A. This means that you will get roughly 4 kW while on a three-phase circuit or 1.4 kW on a single-phase one. The change happens almost in real time and is reversible: you can go back and forth between limited and unlimited without ever interrupting the charging session or disconnecting the vehicle. When the curtailing is active, the Wall Connector will signal it with a blinking red light, in addition to the usual “green waterfall” shown when charging. It can be somewhat confusing when the red LED blinks without a charging vehicle, as it will be the only light visible on the charger, possibly suggesting that it has some fault.

Possible use cases

This can be handy in some cases, for example holiday rentals could easily throttle guests to slower charging while enabling faster charging for the owners.

Here in Italy the default home power supply is a paltry 3 kW single phase, which can be easily be bumped to 6 kW. That is still ridiculously low for this day and age, but Italians are just used to micro manage what appliances are running to prevent their power from being cut. Not many people, though, know that their meters allow 133% power draw (139% for three-phase supplies) for up to 180 minutes, which reset after 15 minutes within the limits. I exploit this very fact to charge my car at 11A three-phase (which usually works out to 7.7-7.8 kW) on my 6 kW three-phase supply. I just run some clever Home Assistant automations to change the car’s charging amps to charge as fast as possible while avoiding power cuts. Should the car loose internet connectivity, though, my automations will fail and my power draw will exceed the 3-hours grace period, my power would be cut and I would have to manually turn the meter’s breaker back on. This can act a since failsafe mechanism, as I can hardwire a smart switch to make sure I can restrict the maximum power draw of the car to 4 kW, no matter what the car does. Since I mostly charge by night when cheaper rates are available, it’s unlikely I will have > 2 kW sustained loads, thus the chance of getting my power cut is minimal.

Categories
Miscellanea

Btwin Elops 920e ebike battery pictures

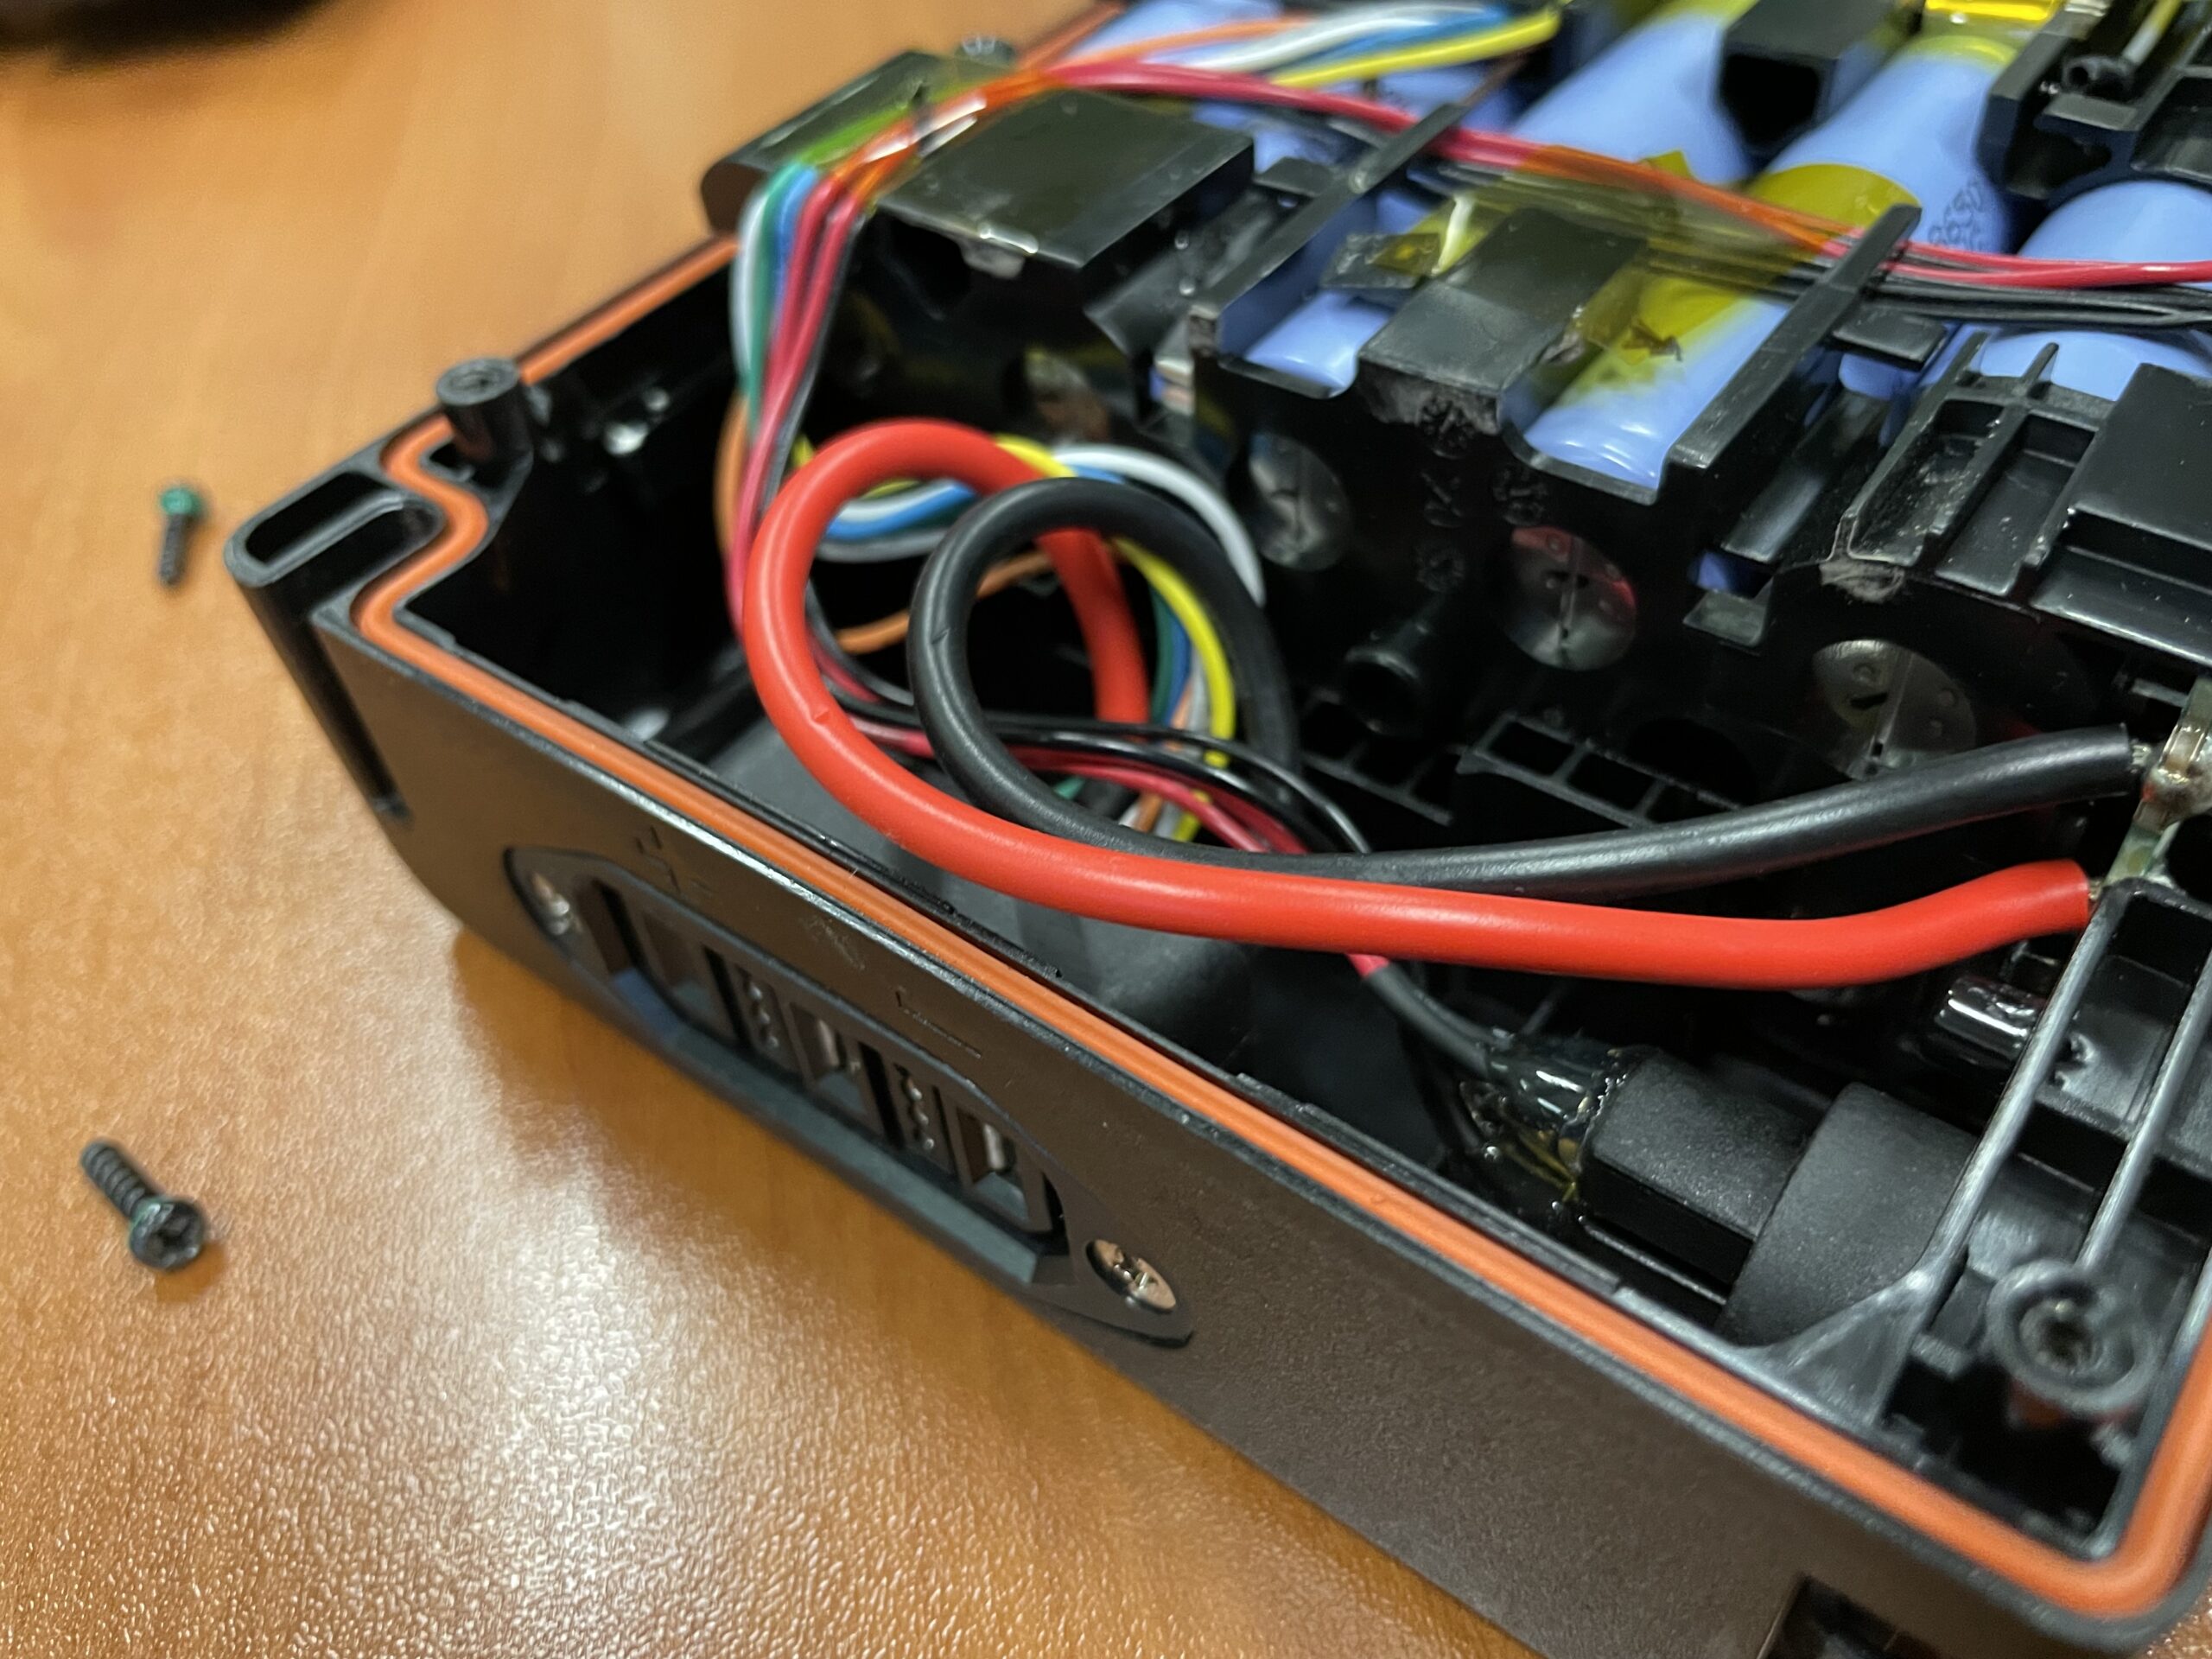
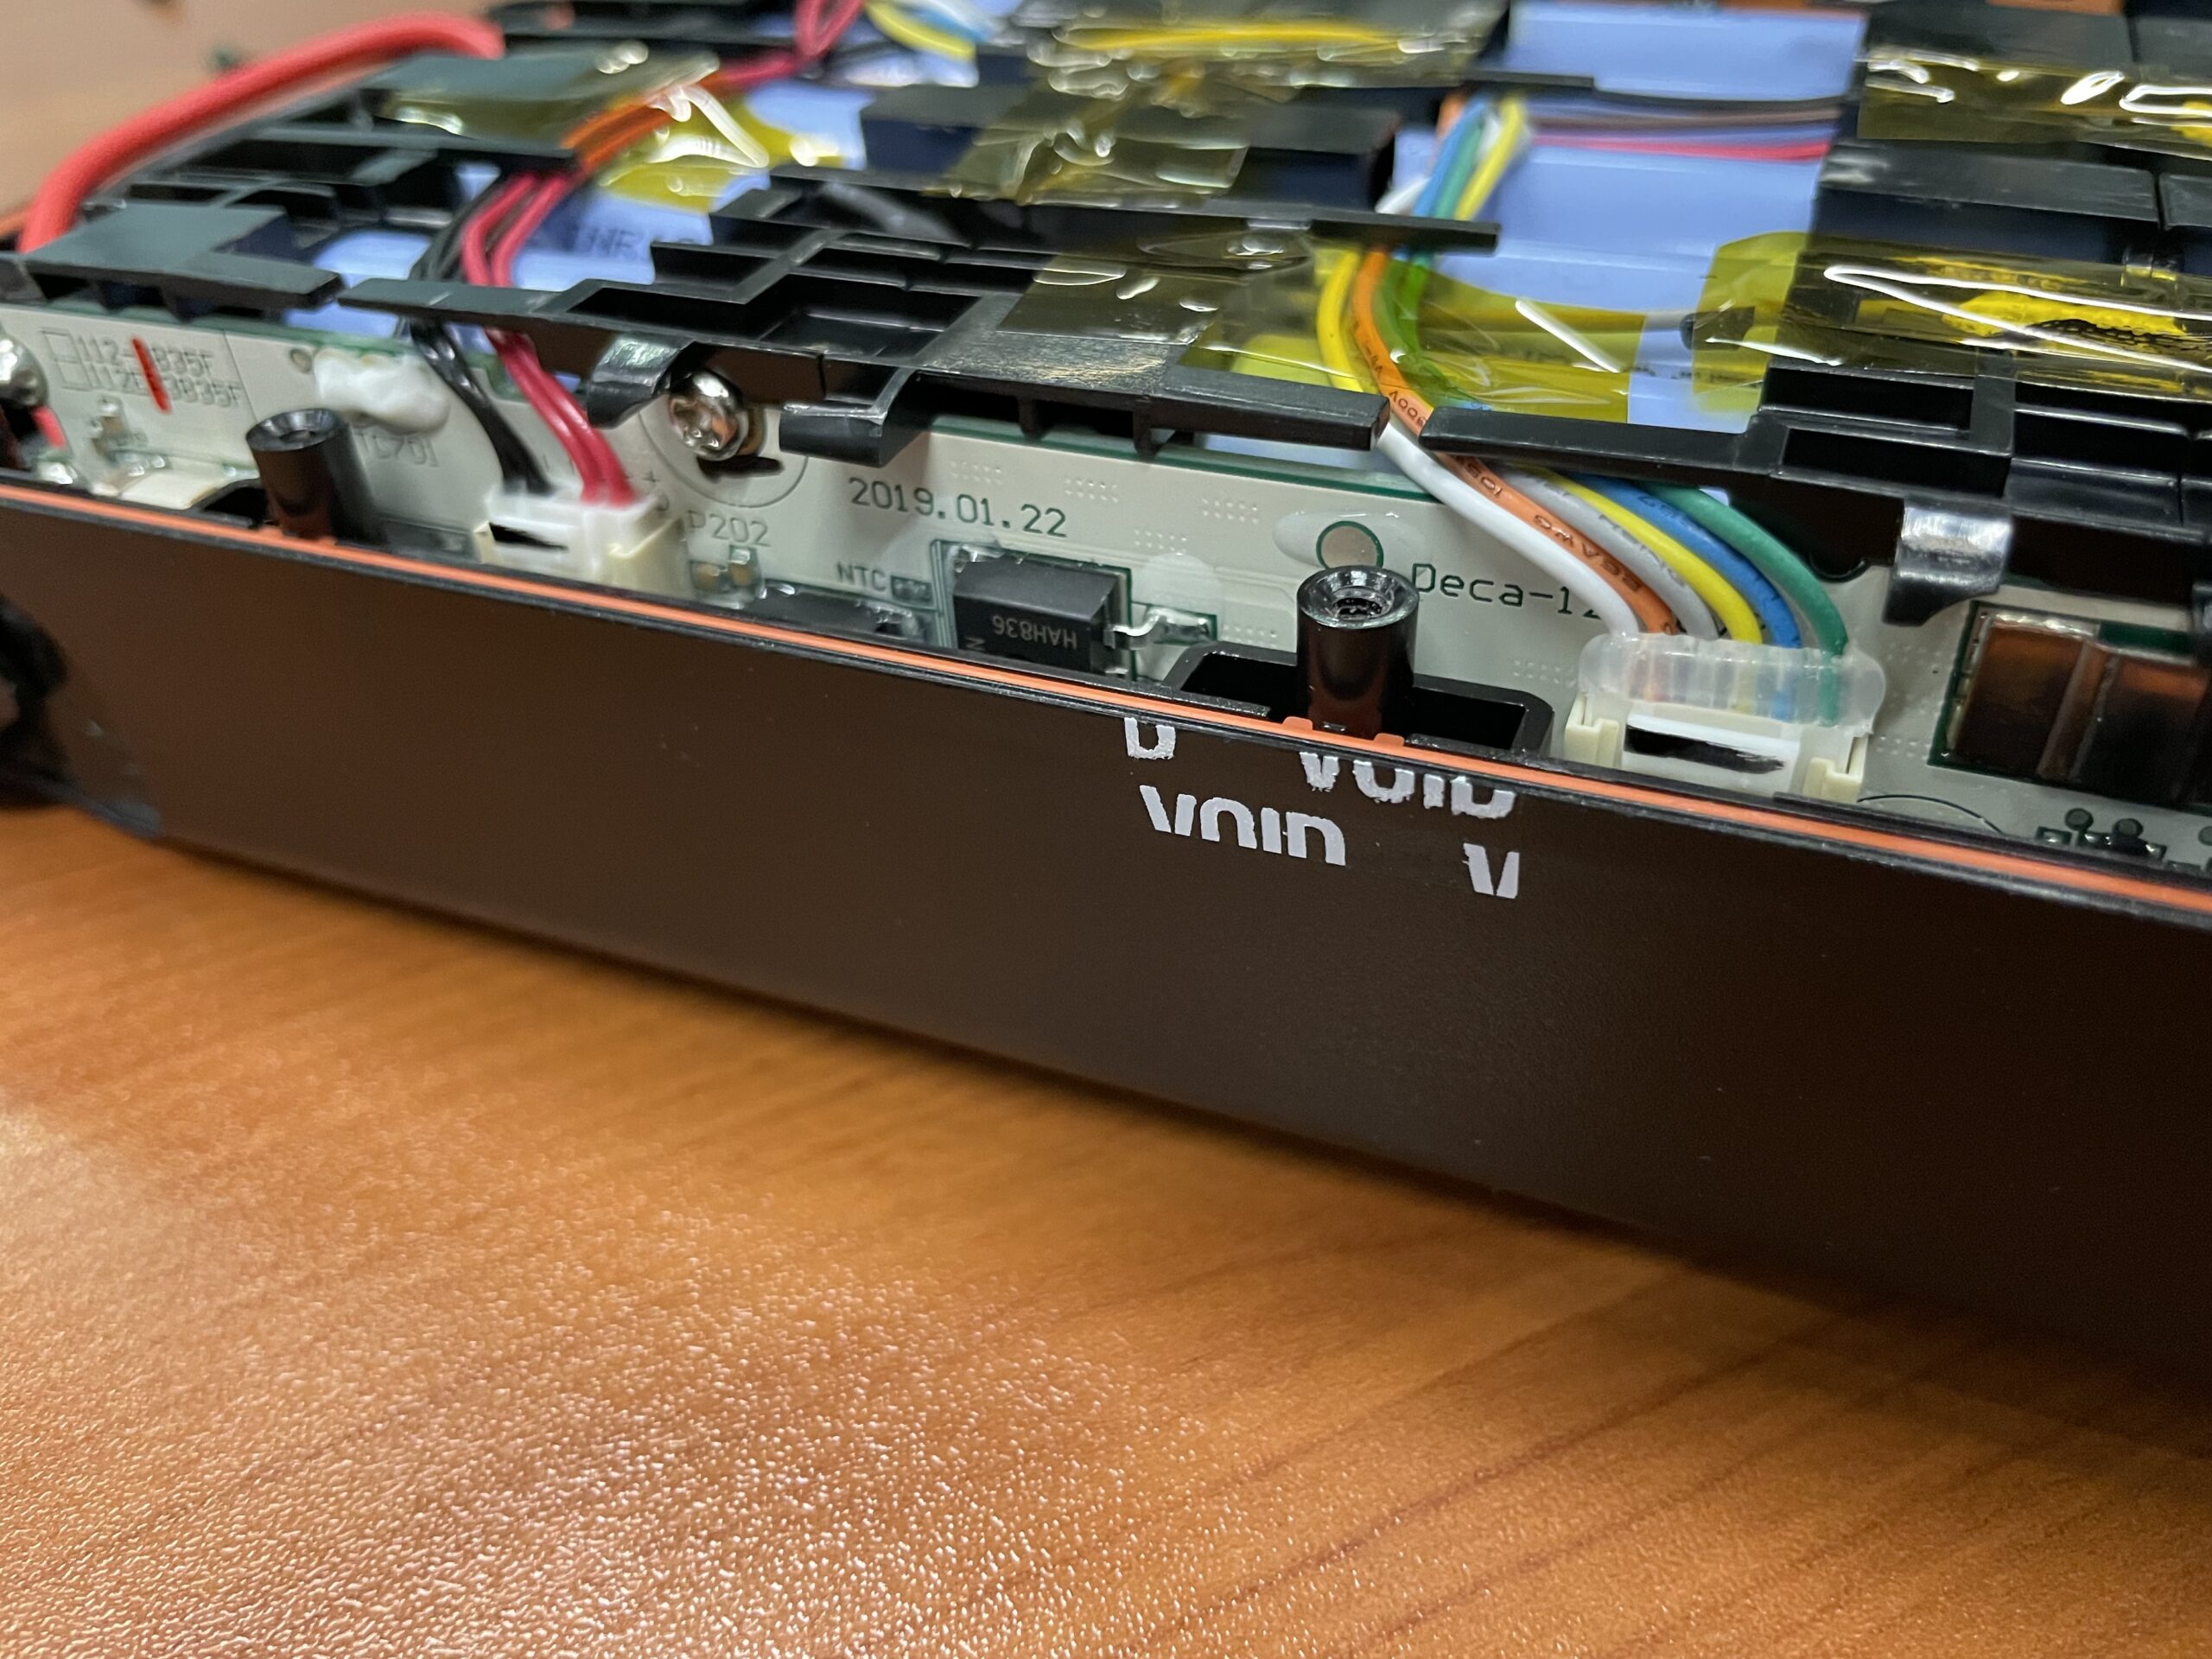
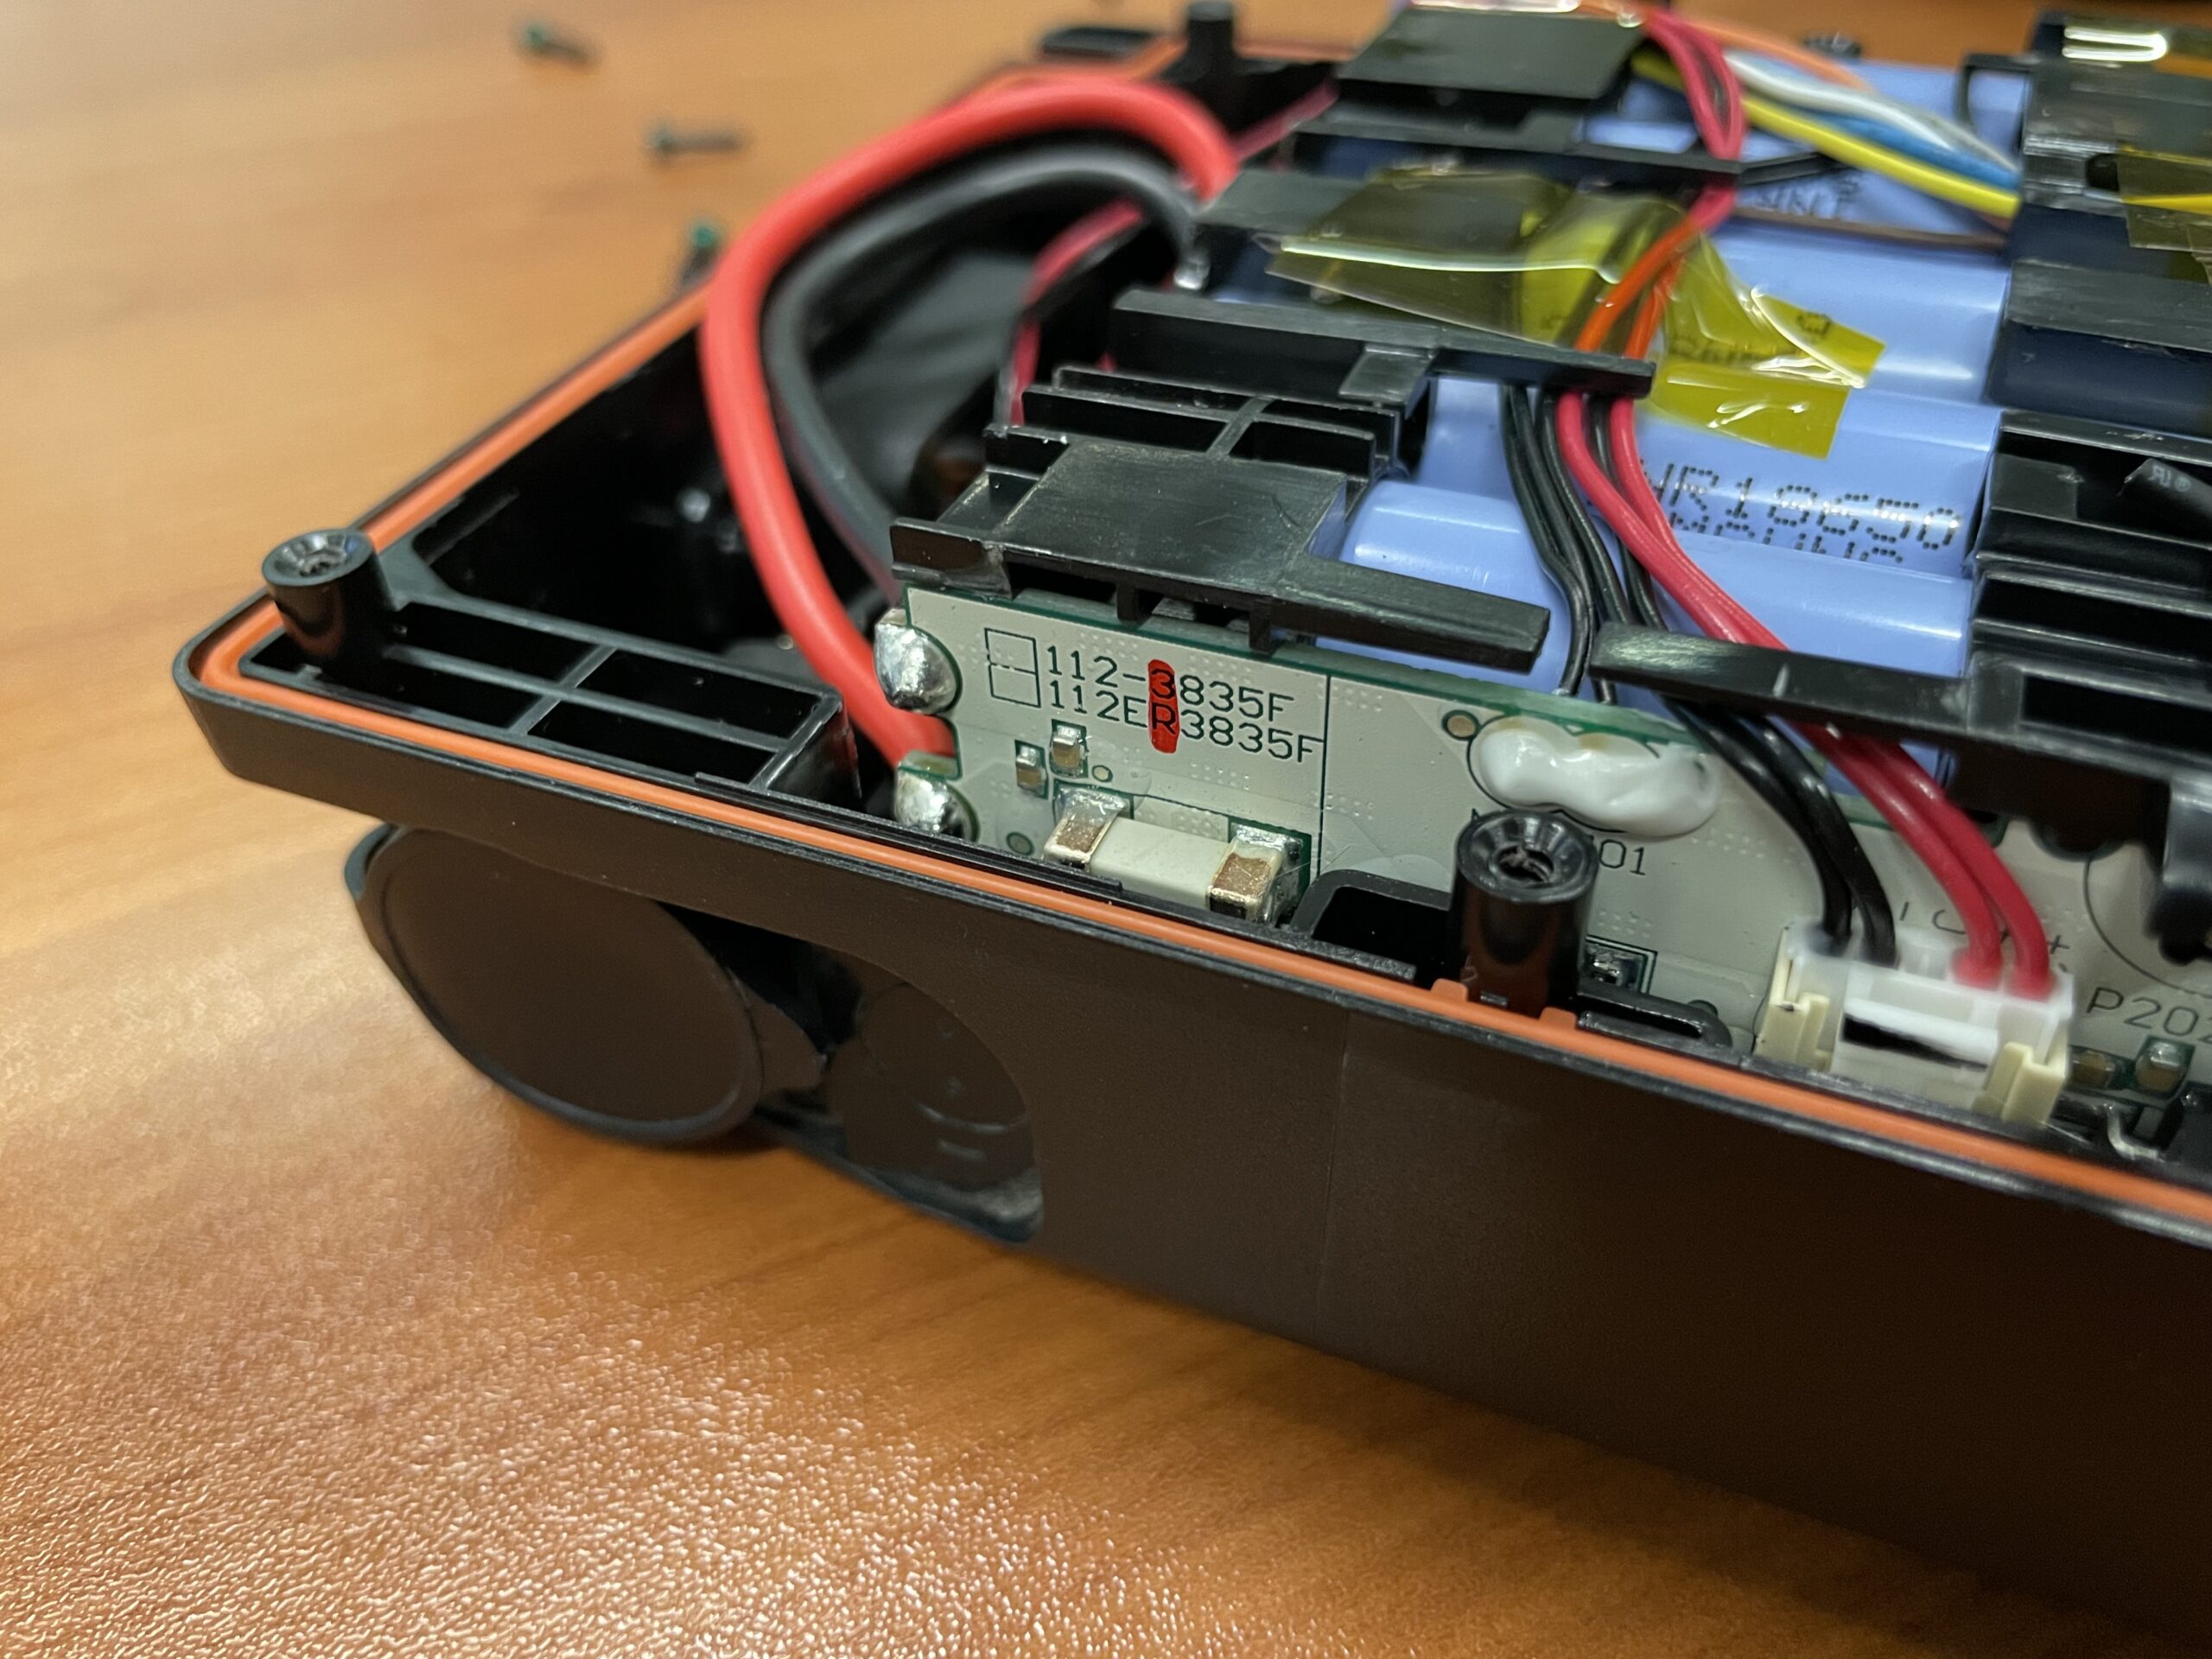
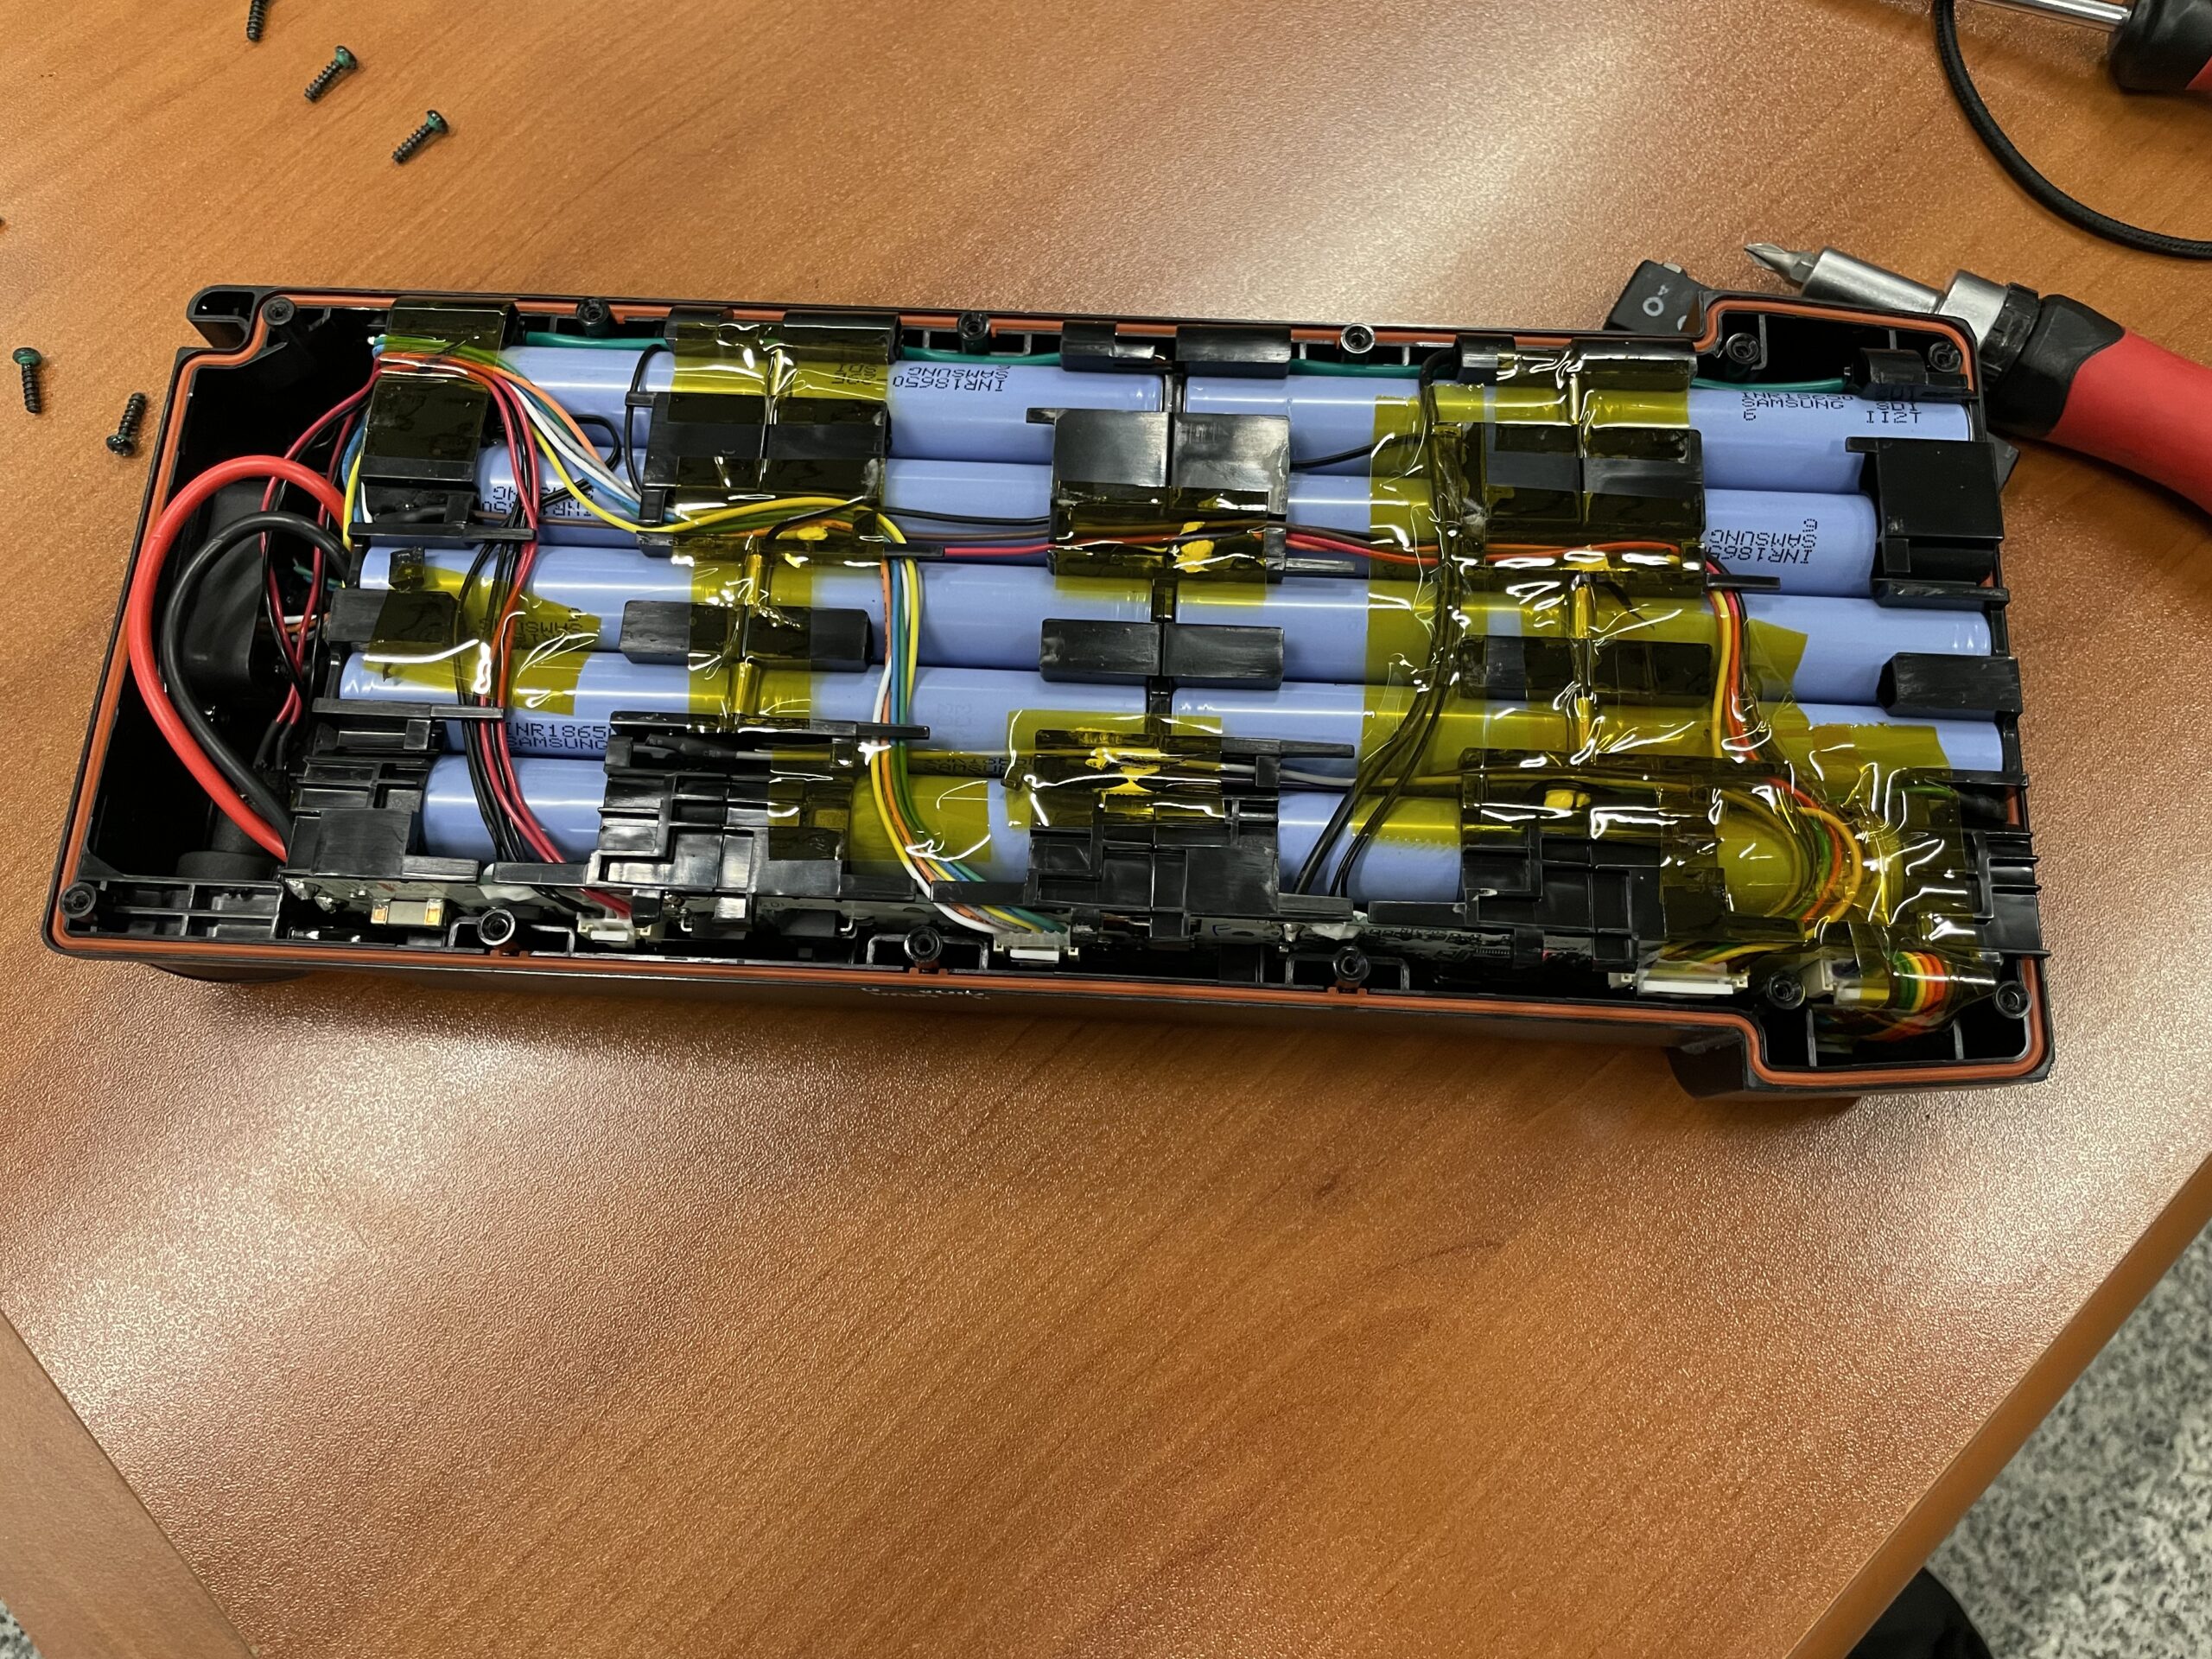
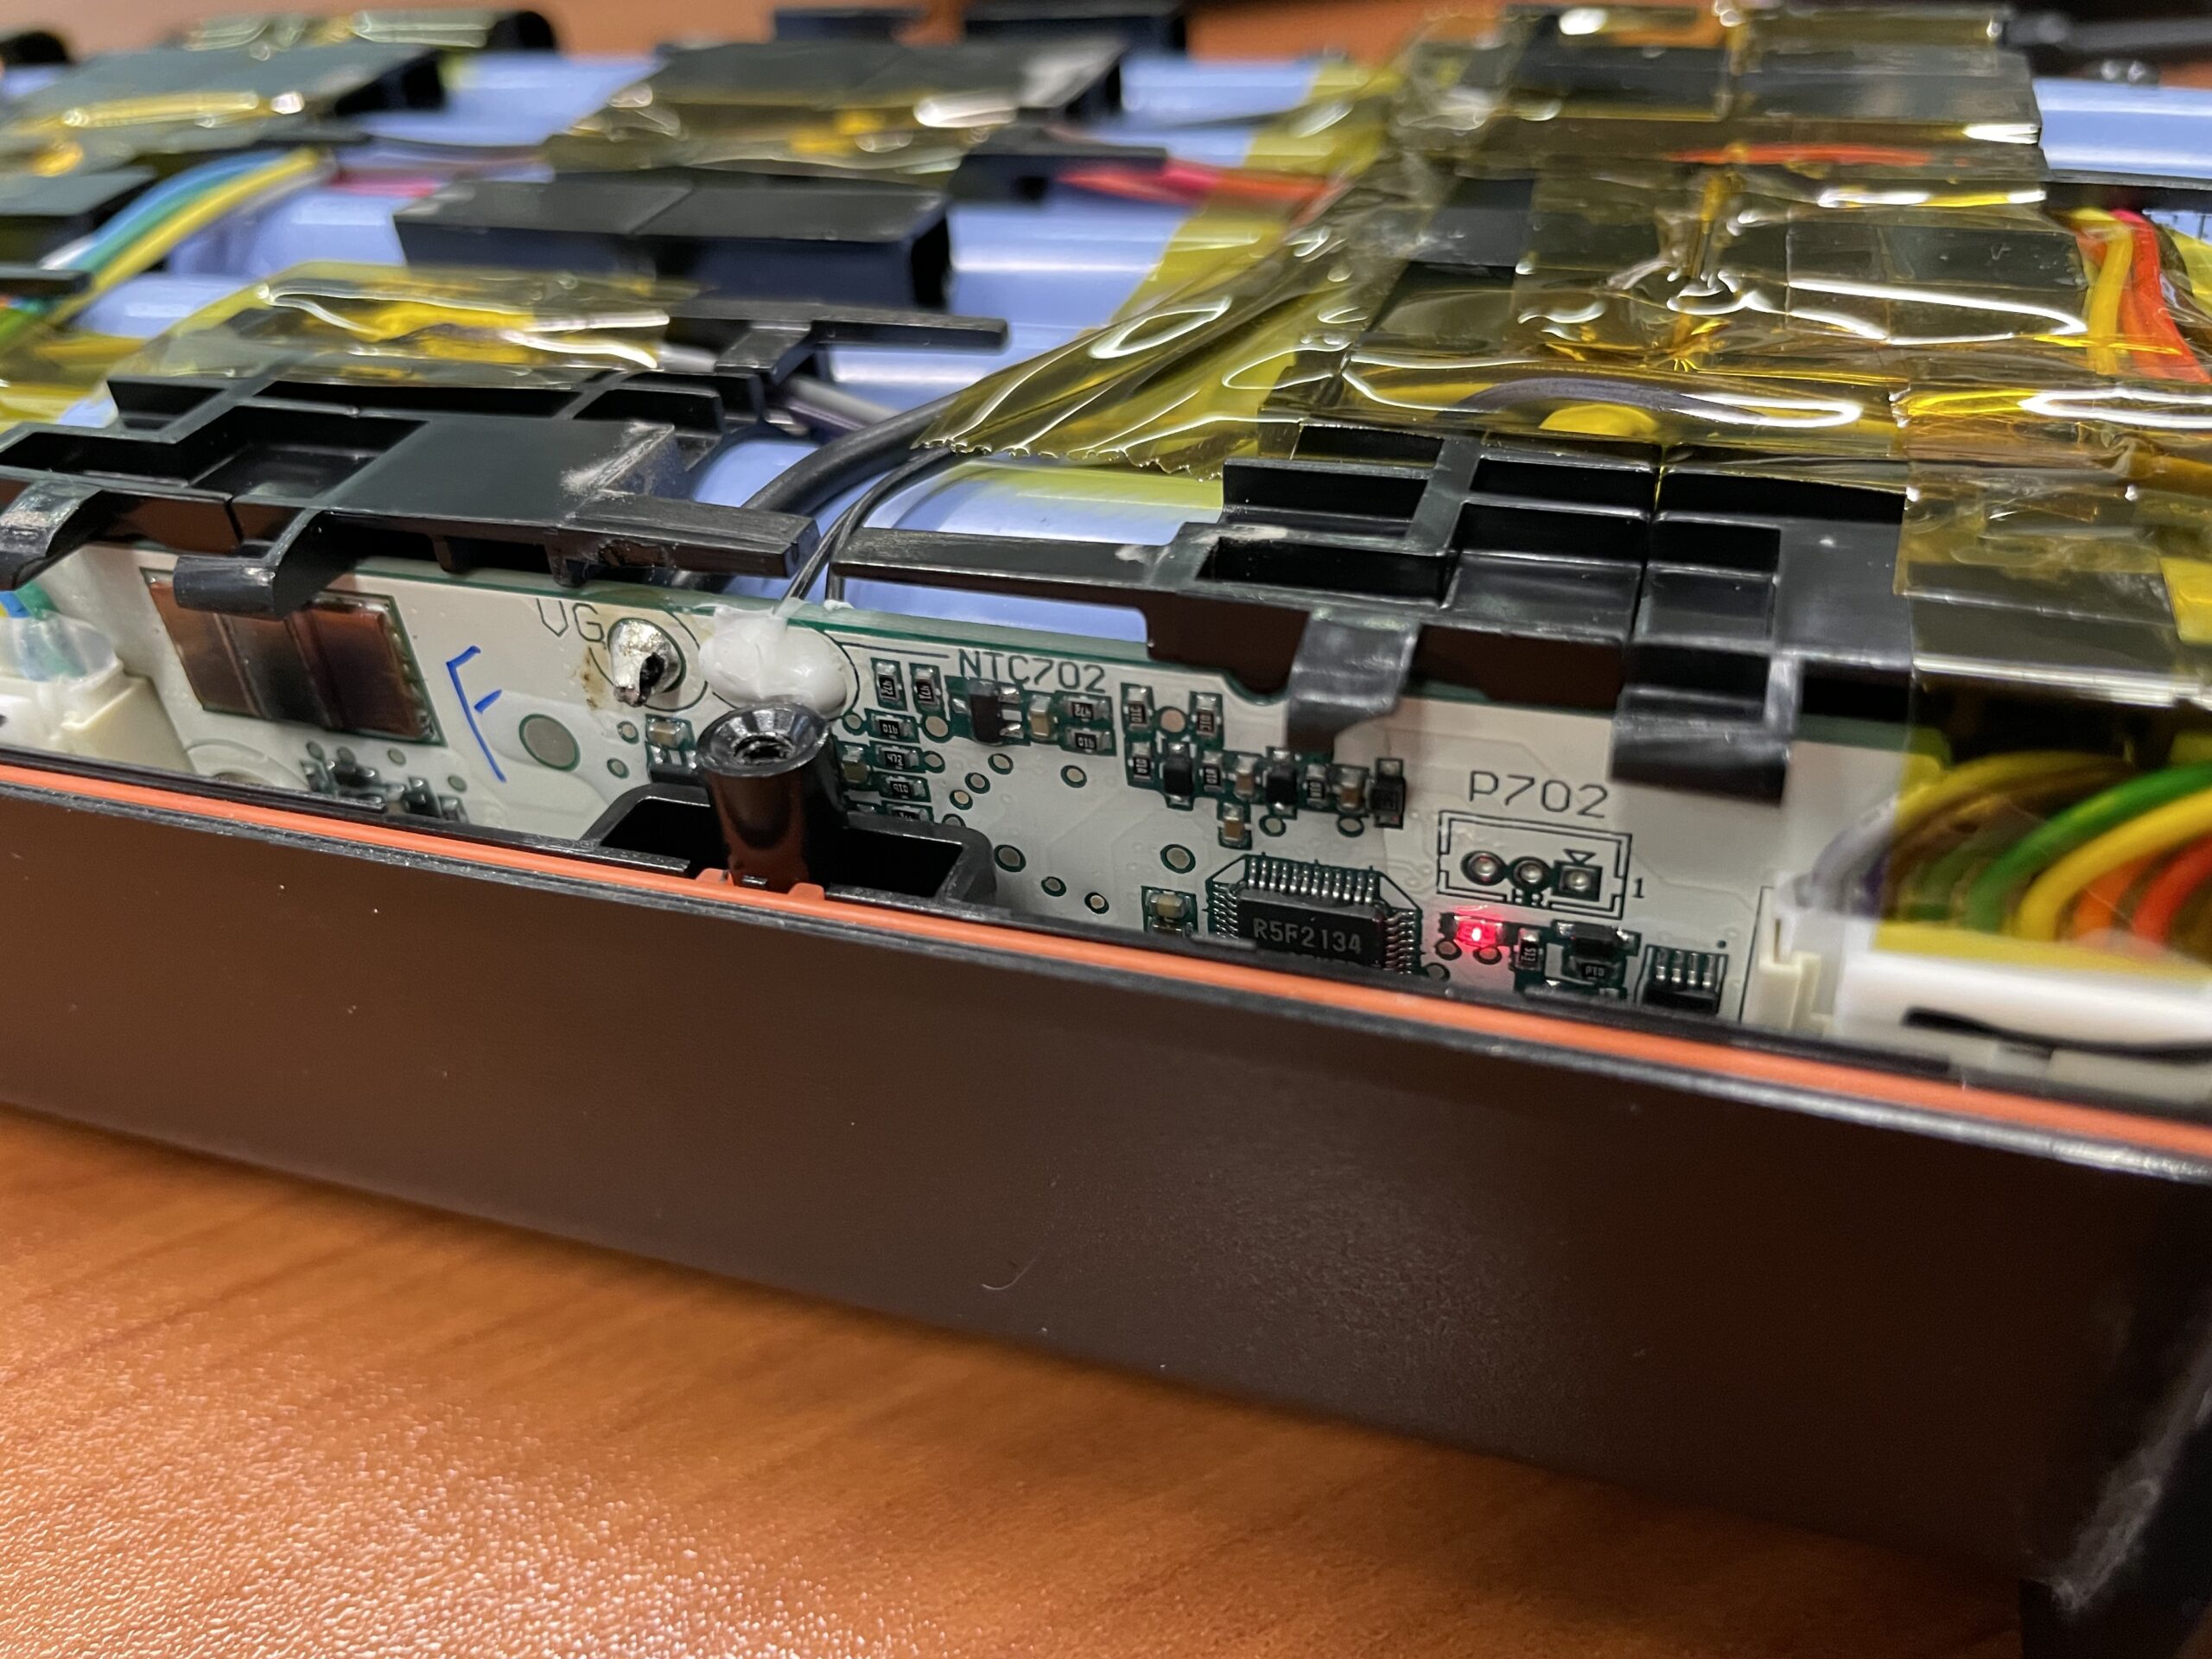
Random post. Since the warranty void sticker was peeling off anyway, I opened the 36V battery of my Decathlon Btwin Elops 920e ebike and took some pictures. Here they are.

Categories
Miscellanea

Edit Excel Formulas with AutoHotKey

At work I’m stuck using a Windows PC, and I often need Excel.

I really dislike the automation landscape on Windows (nothing comes even close to what we have on the Mac, there’s no Alfred, Hazel, Keyboard Maestro, Better Touch Tool, just to name a few), and the only thing I found that is useful is AutoHotKey. It is much harder to use than Keyboard Maestro, but it is quite powerful.

Today I had to change the formulas in a many Excel cells to add an “outer” IFERROR, so I created an AutoHotKey macro to help:

#<::
	Send {F2}
	Send {Home}
	Send {Del}
	SendInput, =IFERROR(
	Send {End}
	Send, ,"")
	Send {Enter}

	Return

The problem is that at the beginning of time Microsoft decided it was best to localize function names, so the English IFERROR becomes the Italian SE.ERRORE, notice the period between the two words.

If I just replaced SendInput, =IFERROR( with SendInput, =SE.ERRORE( I would get SE,ERRORE in my cell (notice the comma), because of regional seettings: we use commas as decimal separators, and periods as thoustand separators (that also brings the funny thing of using semicolons as arguement separator in Excel functions).

The only way I could find to coerce Excel to accept a period and not to translate it to a comma, was to send a unicode string (really). So the final script, for the Italian locale, becomes:

#<::
	Send {F2}
	Send {Home}
	Send {Del}
	SendInput, =SE{U+002E}ERRORE(
	Send {End}
	Send, `;"")
	Send {Enter}

	Return
Categories
Miscellanea

Sign a custom Stripe webhook event

Stripe, its docs and its tools are amazing, but today I found a shortcoming: it is not possible to easily send arbitary events to a webhook endpoint while having signature verification enabled.

So, I made this little script to make things easier:

https://gist.github.com/LucaTNT/b146c15ec391c00d76700673b6439e14

You just need to adjust the webhook URL and secret, then point it to a json file containing the event you wish to send.

Thanks, as always, to a StackOverflow question.

Categories
Miscellanea

Downgrade HP PageWide Pro 477dw firmware to fix cartridge DRM

I used all the black ink of my HP PageWide Pro 477dw, so I bought a compatible cartridge and installed it into the printer.

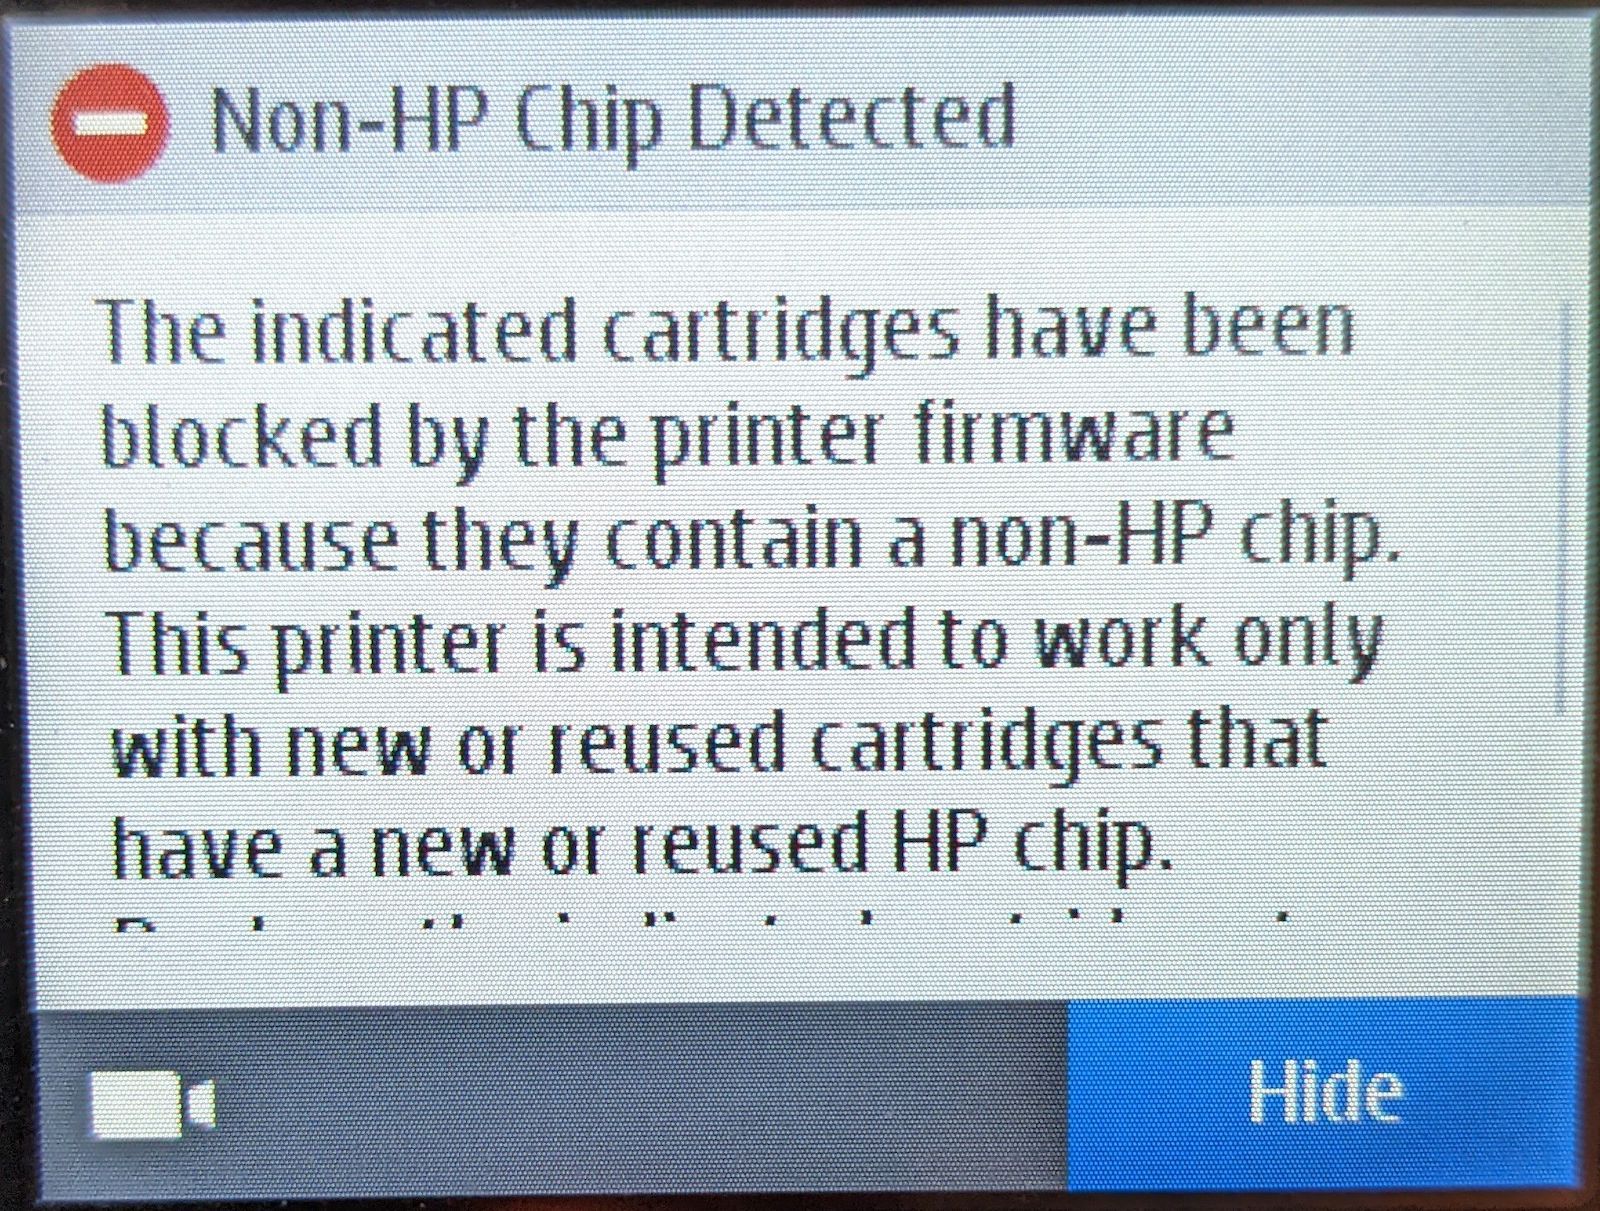
I was greeted with a nice message, courtesy of HP:

The indicated cartridges have been blocked by the printer firmware (MAVEDWPP1N001.2208A.00, released on February 14, 2022) because they contain a non-HP chip.

HP printer screen showing "Non-HP Chip Detected" error Not my printer, but the message is the same.
I dug around and found that the easiest way to solve the issue was to downgrade my printer’s firmware to version 1908C.

Somebody on Reddit helpfully linked to this firmware version’s Windows .exe installer, from which I extracted the actual .ful2 image using 7-Zip.

To install it, copy the .ful2 file in the root of a FAT32 formatted thumbdrive (mine had an MBR partition table, I don’t know if it would work on a GUID one), then connect it to the printer. I left it connected for a while, and initially it only presented me with the option of scanning to the drive or printing something from it. After about a minute it went back to the main menu, from which I re-selected the thumbdrive, and this time it showed a button to update the firmware from the thumbdrive. I pushed it and waited for the update to complete (3–4 minutes total).

Now it works great. (And I disabled auto updates, even though I don’t like that. But I won’t let HP dictate what kind of cartridges I can and cannot use.)

So, to recap:

  • Put this .ful2 file in the root folder of a FAT32-formatted thumbdrive (MBR partition table).
  • Restart your printer (was not necessary in my case, but it was in Rolf’s case, so do it just in case)
  • Connect it to the printer and wait for the printer to go back to the main menu.
  • Press the thumbdrive button from the main menu and then press the button to install the new firmware from it.
  • You’re done. Maybe disable auto updates.

I’m also uploading here version 1921E, should it be helpful in the future.

Post update – Two days later

Even though I disabled auto updates the printer somehow found a way to do it anyway (🤦‍♂️), and I was back at the error message above.
I repeated the procedure, it worked fine, and this time I completely blocked the printer from being able to access the internet. It appears to be working 💪🏻.

Categories
Mac

How to set an APFS quota to a Time Machine Volume

My main computer is a 2020 M1 Mac mini, which is so small, quiet and cool that I can keep it in a drawer of my desk, which due to me living in a small apartment is located in my bedroom.

As part of my backup regime, I have an old 2.5” USB drive connected to it for Time Machine. The problem is that often my Mac would wake up in the middle of the night to perform a backup. That is nice, but it also means that the drive would start grinding, sometimes waking me up or preventing me to get asleep in the first place.

I was fed up with it, and I switched to a 1 TB SSD, which is totally silent, just like my Mac.

Having an entire drive dedicated to Time Machine only, though, was a bit excessive, and I wanted to be able to keep some files on it as well. I know I could just put them in the same APFS partition Time Machine is using, but given how finicky it can be at times, I preferred leaving it alone and resorting to a nice feature of APFS, which is having different volumes on the same disk. Volumes are not like partition, they are not fixed-size: they share all the available space on the drive. This way you cold have 10 volumes on a single 1 TB drive, and they all would see 1 TB of free space in the beginning.

That is all great, and you can easily add volumes to an APFS drive thorough Disk Utility, you just have to select the drive from the sidebar and click the + button on the tool bar on the right. You also get a handy feature which I wanted to enable for my Time Machine volume: the ability to set a quota for that volume, which is basically a hard limit on the size of that volume. I wanted to make sure Time Machine could use at most 500 GB of the 1 TB, while allowing my data volume to use all the available space if necessary.

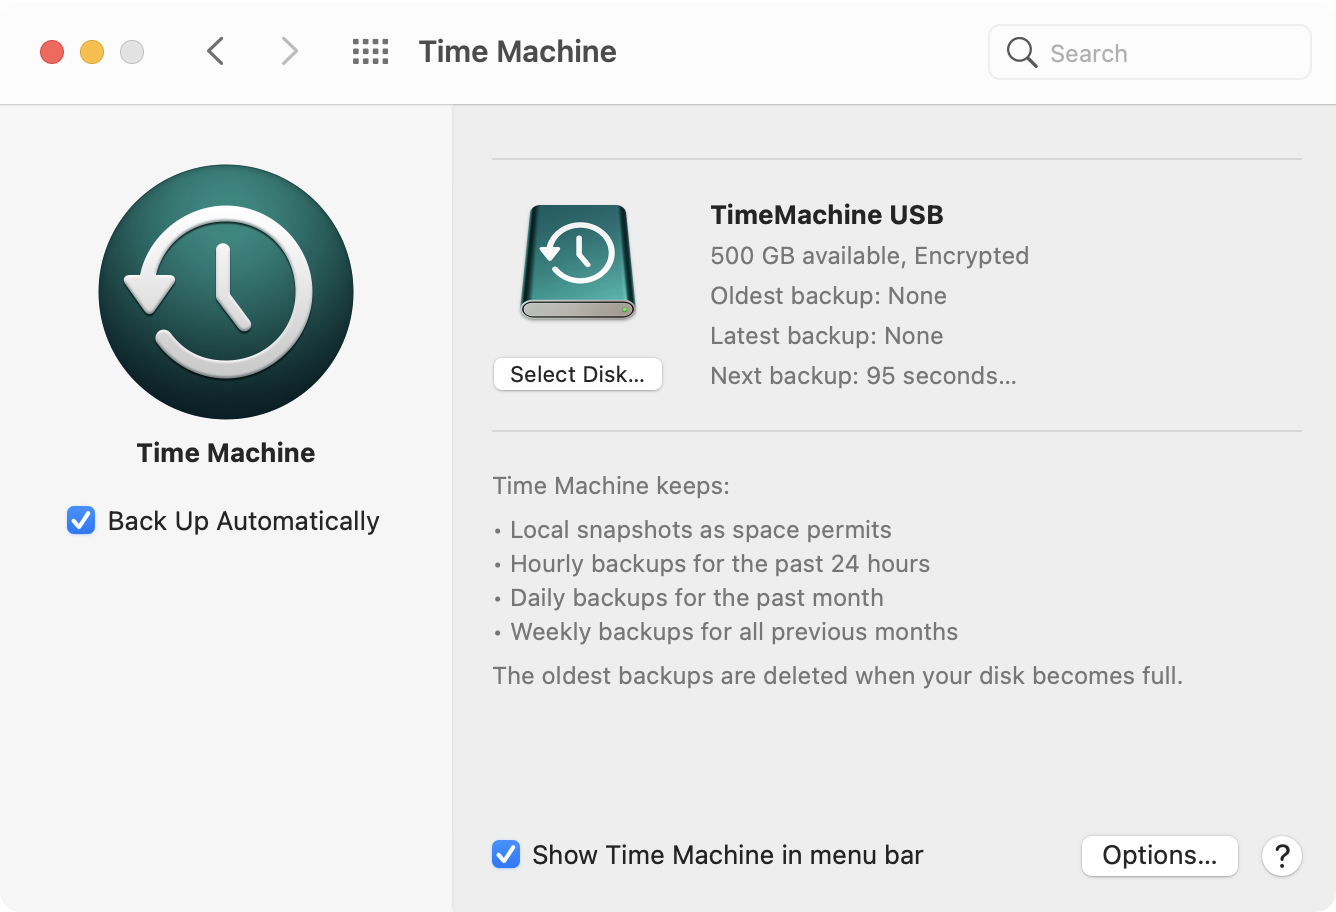
Time Machine's preference pane showing the 500-GB volume I created on a 1 TB APFS-fromatted disk

The problem is that when I went to the Time Machine preference pane and selected my newly created volume as its target, it would reformat it and remove its quota, thus giving it the ability to expand to the whole drive. What’s worse, it even erased all the contents of my other volume, which I’m afraid is a bug.

The solution, as always, was to resort to the Terminal. I found my answer in this helpful Stack Exchange thread: you have to add the volume using the diskutil command and applying the T role, which stands for Time Machine and will avoid having to erase the volume after selecting it as the destination drive.

diskutil ap addvolume disk7 APFSX 'TimeMachine USB'  -passprompt -passphraseHint 1Password -quota 500g -role 'T'

You will, of course, need to replace disk7 with your disk identifier (which you can find in Disk Utility or through the diskutil list command). As you can see I’m also encrypting my volume and I am setting an hint, but if you don’t need that and are fine with your backups sitting in the clear on your drive, you can omit the -passprompt and the -passphraseHint options.

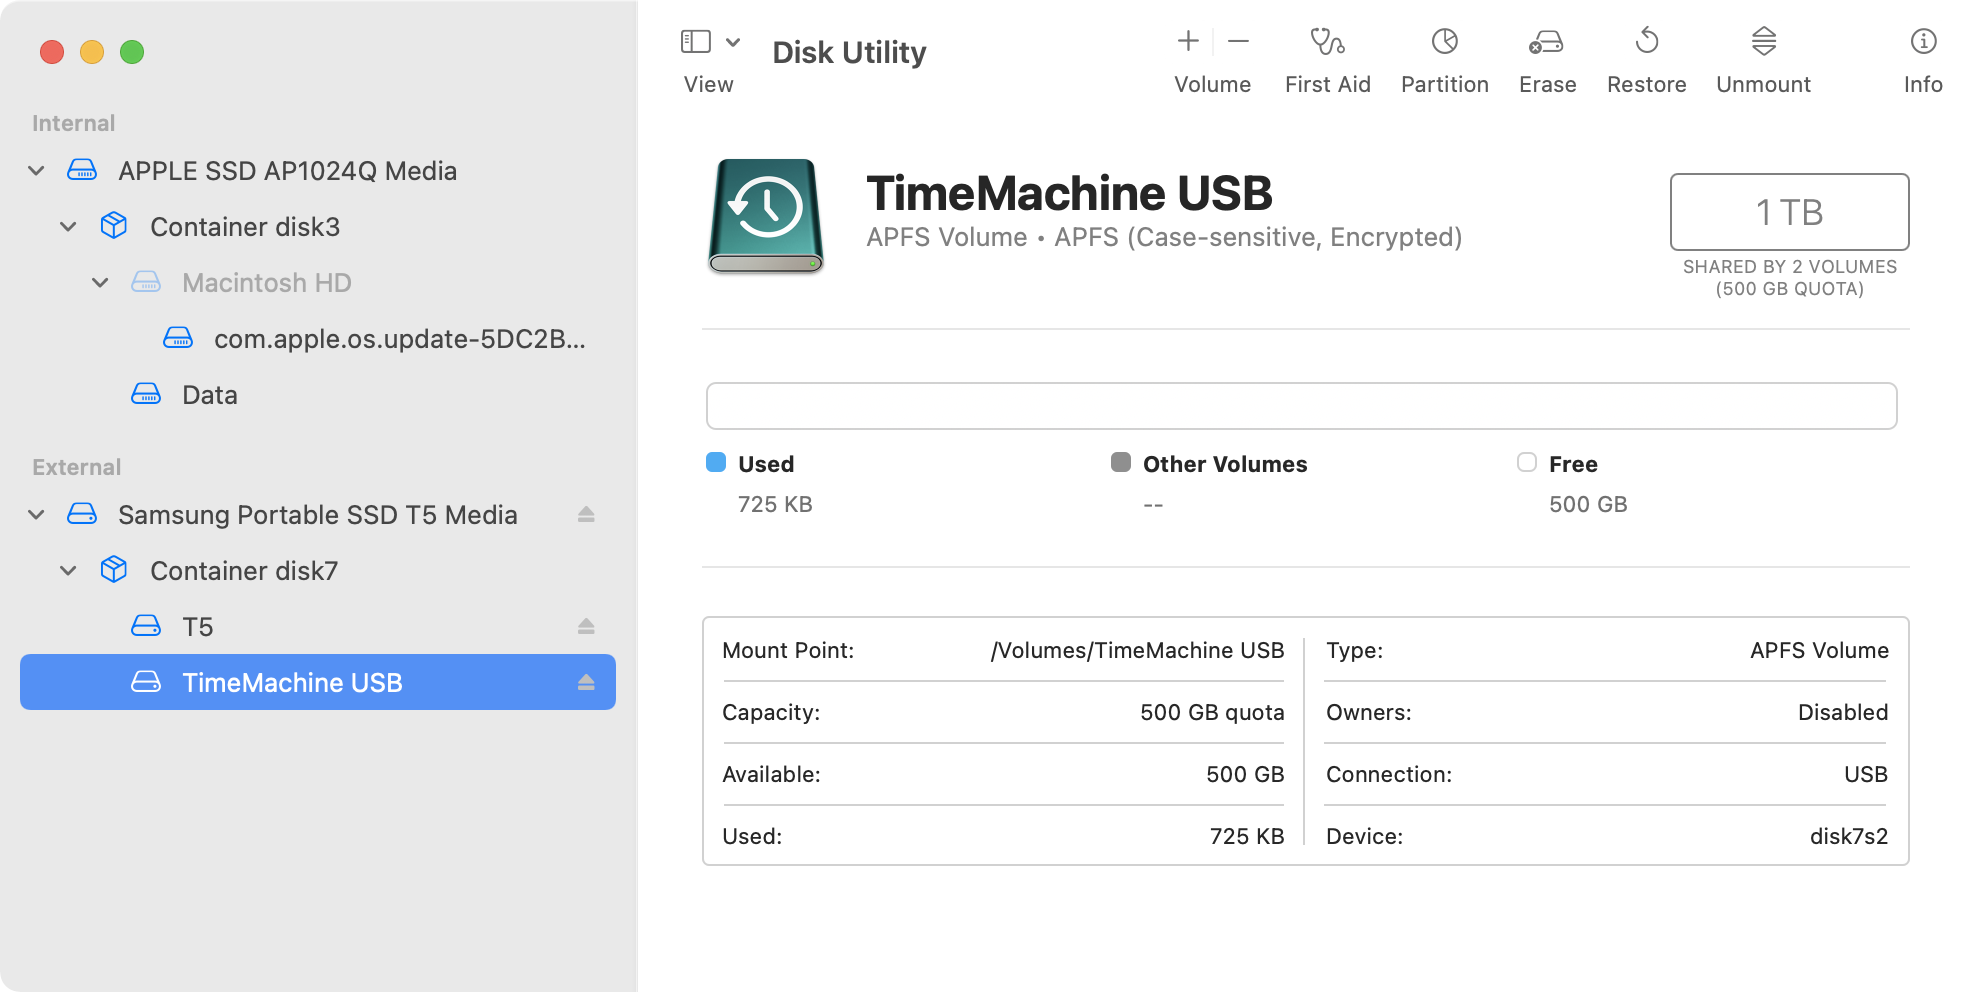
Disk Utility showing a 500 GB Time Machine volume on a 1 TB APFS-formatted SSD
Success! Disk Utility is now showing a 500 GB Time Machine volume on a 1 TB APFS-formatted SSD
Categories
Linux

Fix portainer-agent restart loop

For I while I’ve had two Docker hosts on my home network, one with Portainer installed and the other one with portainer-agent, to be able to have a single webinterface to manage both.

Portainer Logo

The one hosting Portainer has always had watchtower installed, in order to automate the upgrade of all containers, the second one did not. Once I realized it, I setup watchtower on it as well, and that’s when issues begun.

The issue

portainer-agent would enter a restart-loop, filling the logs with entries such as:

2021/10/31 07:53:21 [INFO] [main] [message: Agent running on Docker platform]
2021/10/31 07:53:21 [ERROR] [main,docker] [message: Unable to retrieve local agent IP address] [error: Error: No such container: 6d3437033dce]

The weird thing is that it was mentioning container 6d3437033dce, while portainer-agent was running as 9bf8b8a94d03.

I suspected it was due to something watchtower was doing when recreating containers after pulling the latest version.

A few searches later, I ended up finding this GitHub issue for portainer-agent, where jackman815 found that the issue was related to the way watchtower assigns the same hostname to the new containers.

I found the problem is about the watchtower, it clones the container configs included hostname when upgrading the container.

When upgrade/re-create the container, by default the docker daemon will assign a new hostname to the container and update internal dns, but the watchtower won’t update the container hostname after the container upgrade so the agent will try to look up the old hostname and it would be getting nxdomain result by docker internal dns.

The solution

As suggested in that issue, the solution is assigning a static hostname to the portainer-agent container.

To do so, stop and delete the old container, then re-create it with the --hostname option.

docker stop portainer_agent
docker rm portainer_agent
docker run -d -p 9001:9001 --name portainer_agent --hostname portainer_agent --restart=always -v /var/run/docker.sock:/var/run/docker.sock -v /var/lib/docker/volumes:/var/lib/docker/volumes portainer/agent:latest

Of course you’ll have to adjust the container name/hostname to match your setup.

Categories
Mac

Fix garbled output of the tree command on macOS

Recently I had the need to produce a text file containing the directory structure of a folder and all its content.
The tree command is just what I needed. A quick brew install tree installed it on my Mac.

One would think that it would just be a matter of running

tree /path/to/folder > /path/to/tree.txt

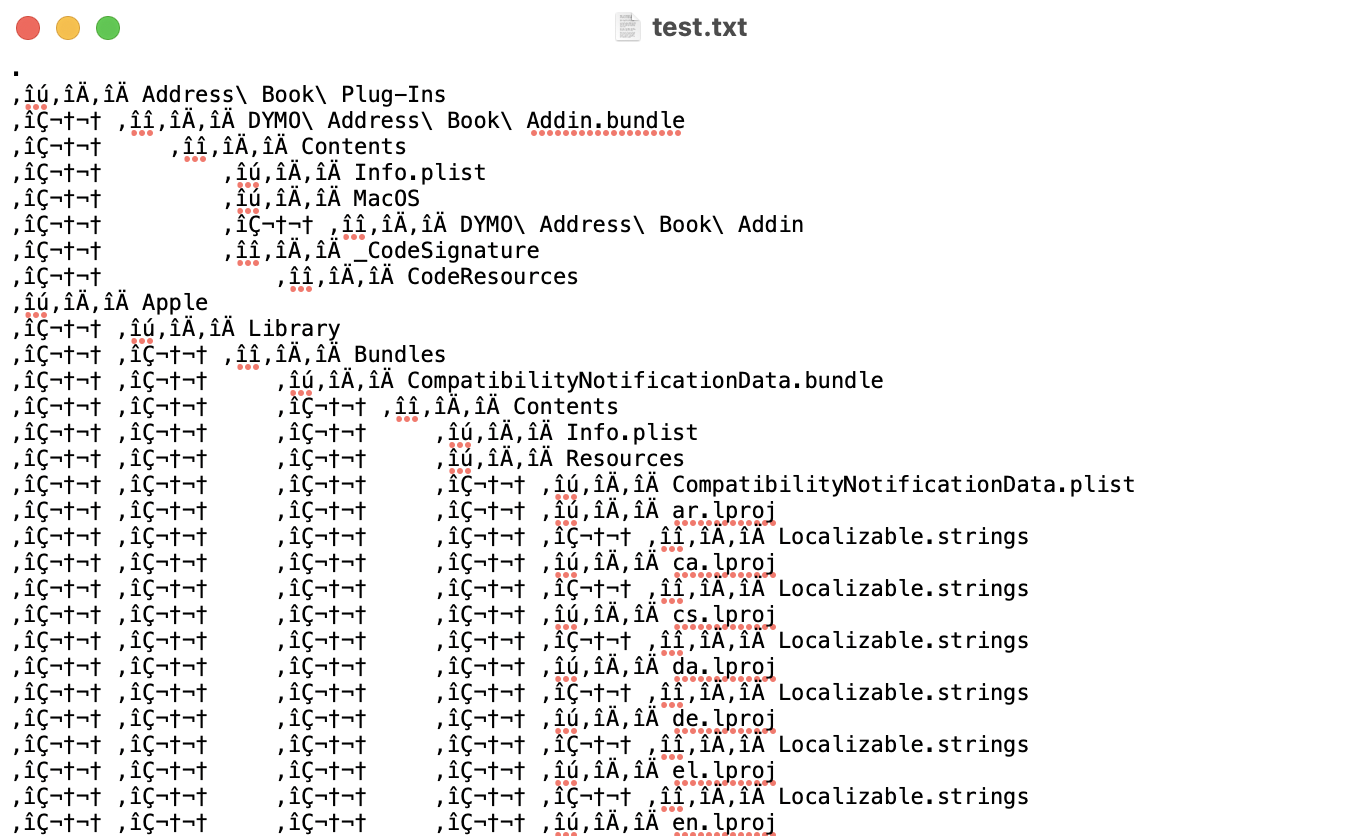
That’s true, for small directories (or those with no special characters?), for others I get this lovely crap:

Screwed up oupput of the tree command on macOS

Turns out the fix is pretty easy (altough you loose non ASCII characters in file names):

LC_ALL=C tree /path/to/folder > /path/to/tree.txt
Categories
Miscellanea

Podcast chapters and Ableton Live

TL;DR Extract markers timestamps from Ableton Live .als project files into .cue files to generate podcast chapters with als2cue.

I’ve been recording and publishing podcasts for almost 10 years, and for most of the last decade I’ve been using Ableton Live to record and edit them. I was already familiar with Live from my “deejay period”, when I approached EDM music production, so it felt natural to keep using the tool I already knew.

The rise of podcast chapters

In the last few years, adding chapters to podcast files has become mainstream. It is very handy for listeners to jump around within an episode to reach the section they’re interested in. Heck, I even added automatic chapter listings to the CMS I developed for my podcast network (see an example in this episode, look at the “Capitoli” section).

But while it is great for listeners, the same cannot be said for podcasters. It requires significant effort to place and name chapters by hand, and I needed to automate the process a bit to make it doable without investing too much time in it.

Ableton Live Markers Locators

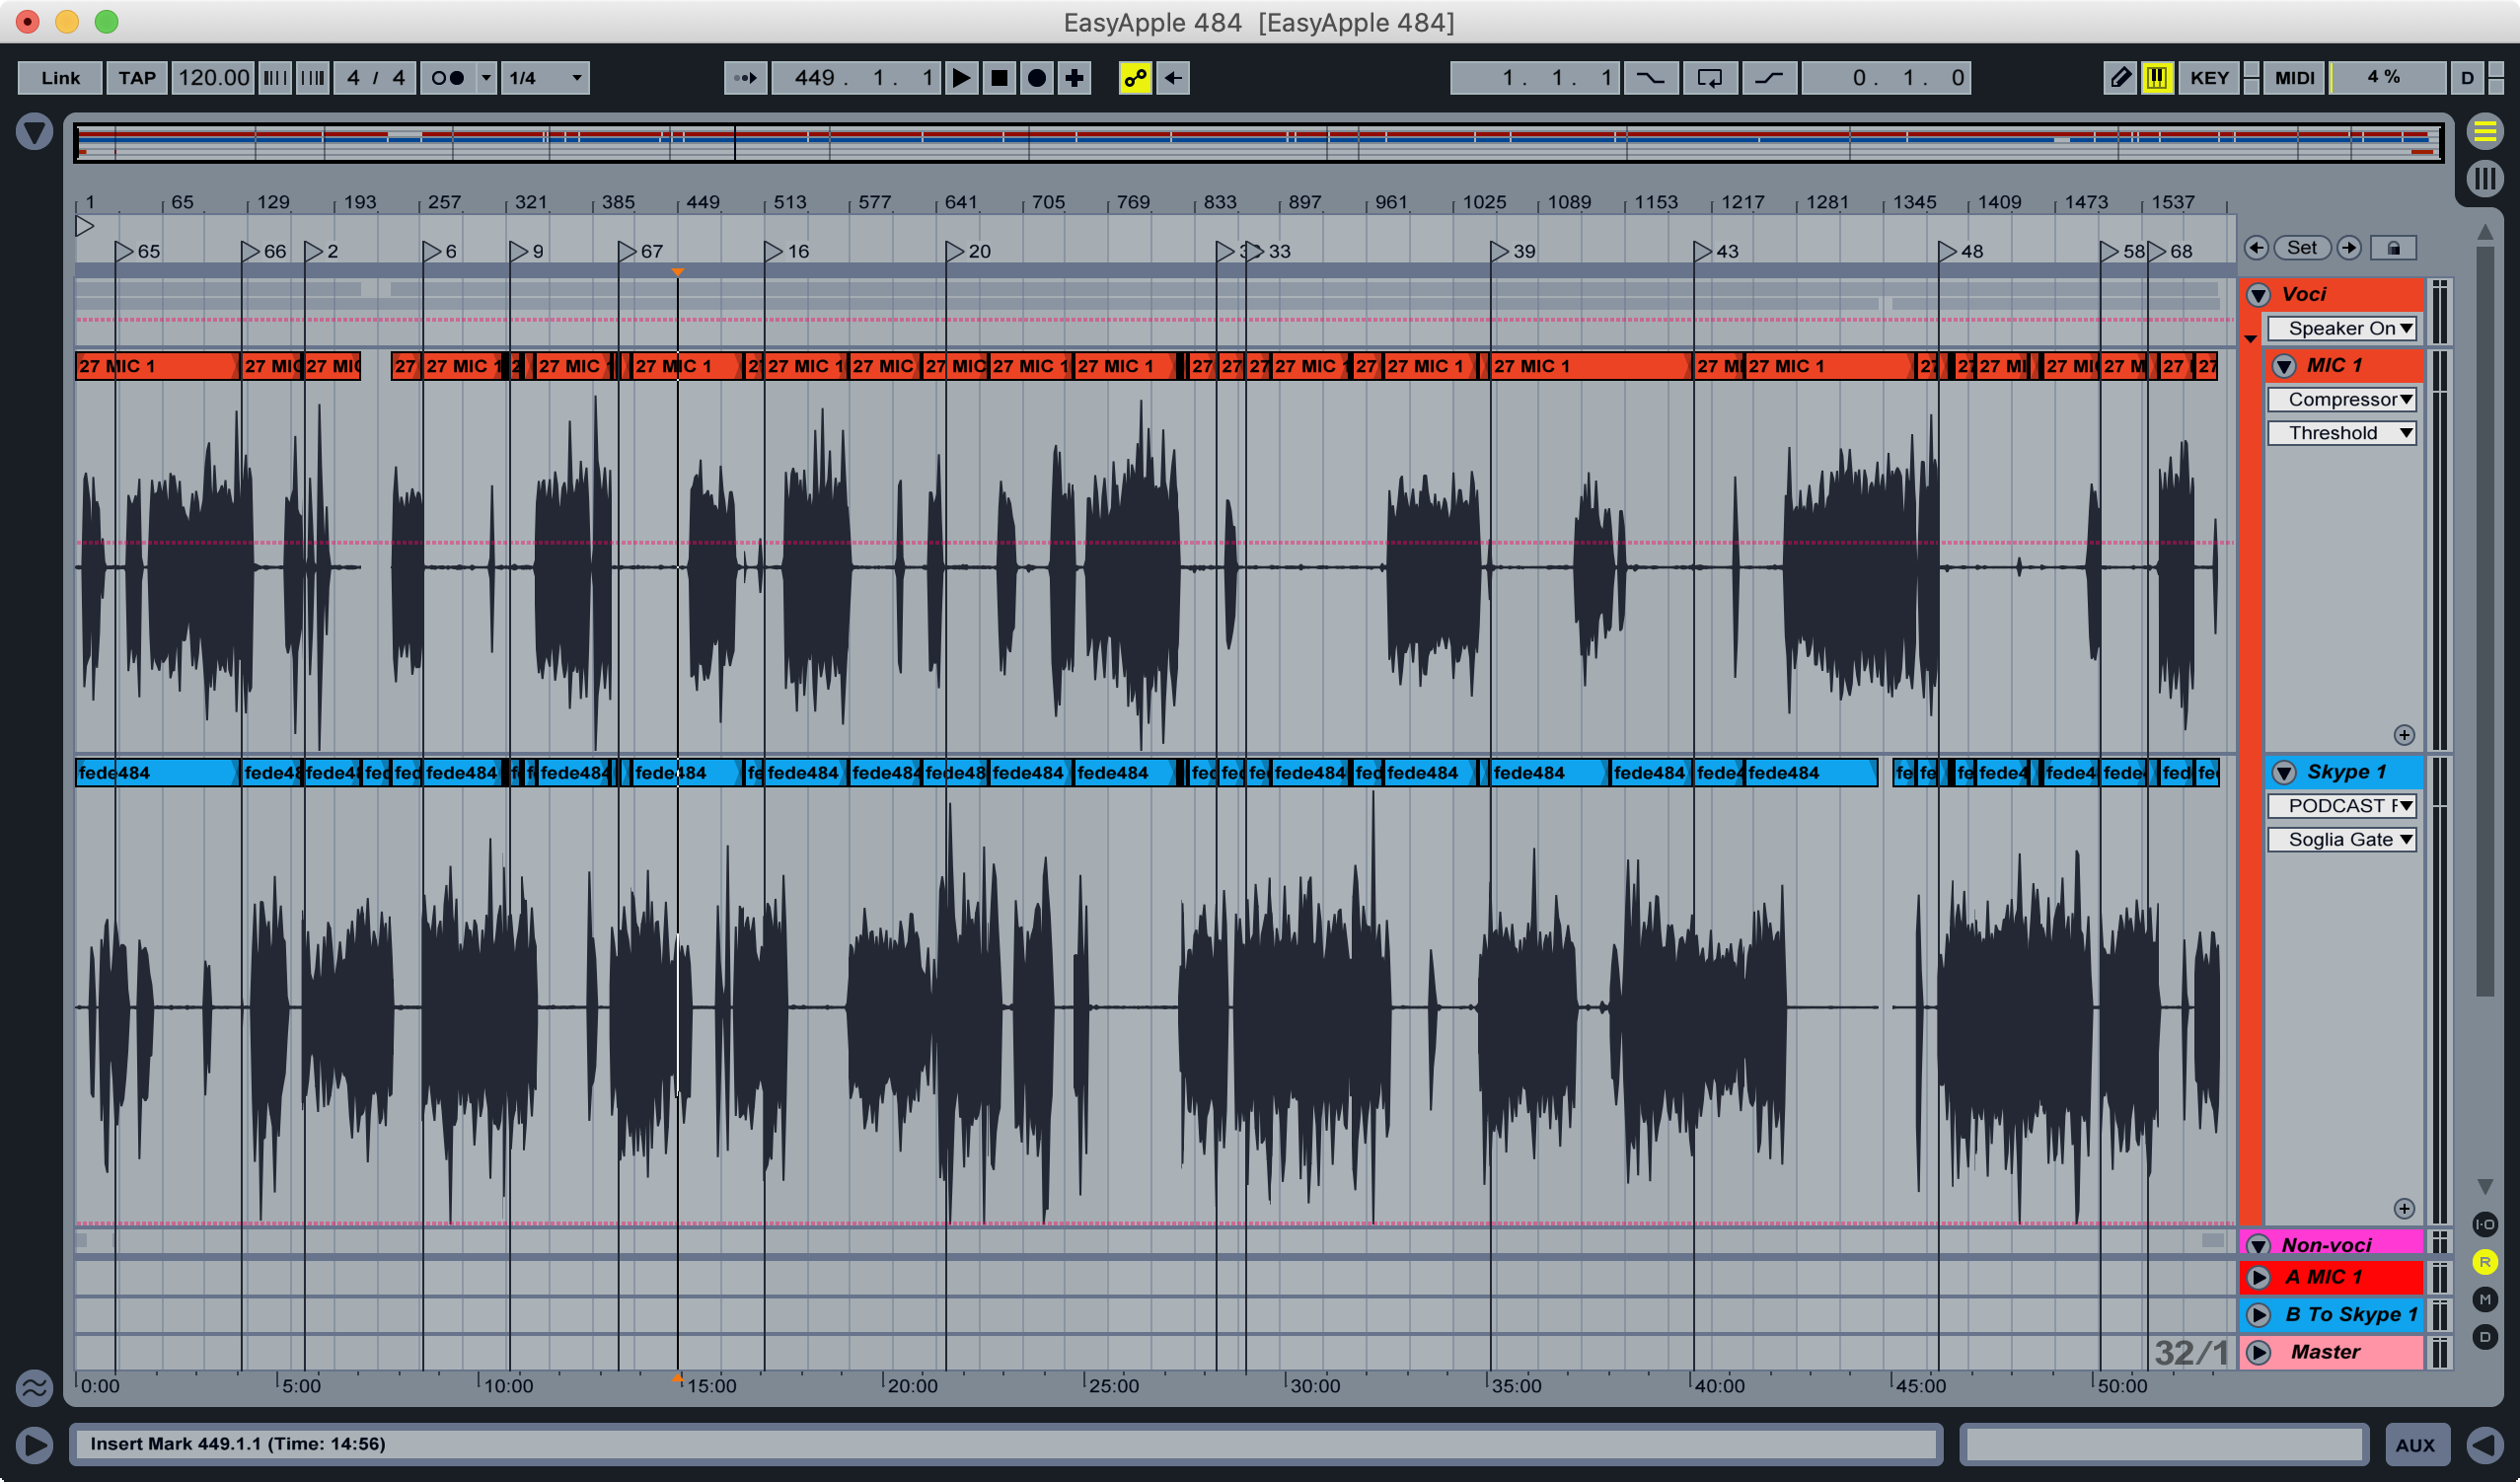
Ableton Live includes a great feature, Locators, to help mark sections of an arrangement. I add them while recording to mark roughly when we changed topics, then during editing I fine tune their location.

Screenshot of Ableton Live project with many locators

The thing is, when you export an .aiff file from Live, you don’t get the position of each marker in the file’s metadata like you do in Logic Pro, and my mp3 encoding app of choice, Forecast, cannot automatically insert chapter markers in the .mp3 file.

Extracting Locators from .als project files

Digging around, I found out that Ableton Live’s .als project files are basically just zipped xml files.

I then wrote a Python script that takes the .als file as input, and spits out a .cue file containing all the timestamps. Why a .cue file, you ask? That’s because Podcast Chapters, an amazing Mac app by Fredrik Björeman, supports .cue files to create chapters, which can then be named easily through its GUI.

It has worked great for me for more than a year, but it is not really user friendly.

My brother needed to edit an episode of another podcast, and it was just too cumbersome to have him run the Python script, so I decided to build a really simple web interface around my script: als2cue_web was born.

als2cue_web, who dis?

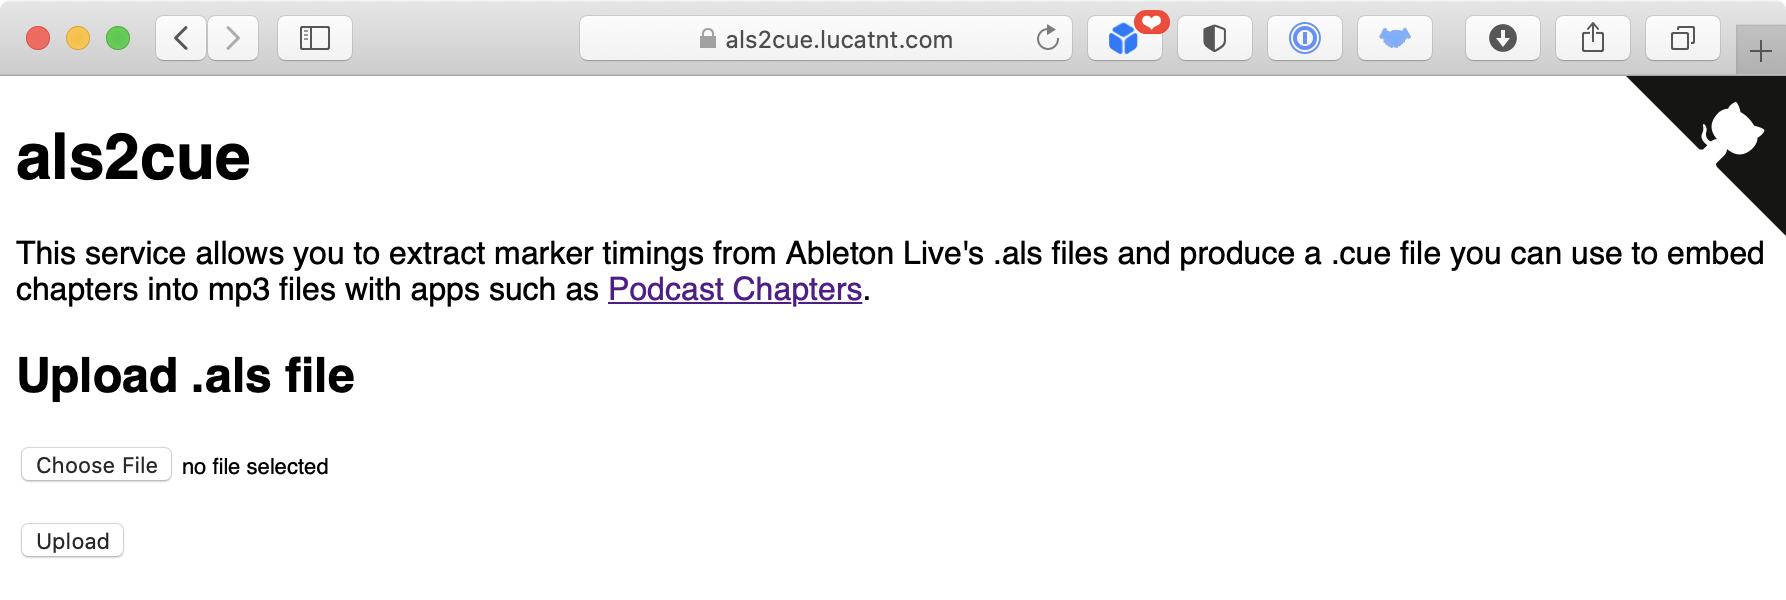
The web app is available for everyone to use at als2cue.lucatnt.com, it just asks you to upload a .als and returns a .cue file with each locator’s timestamp.

Screenshot of als2cue_web
als2cue_web’s sophisticated, hand-crafted interface in all its glory

It is open source, and thus can be easily self hosted. It is available from my Github repo (pull requests welcome!) and as a ready-to-use Docker image, lucatnt/als2cue_web, you just need to expose port 80 of the container to a local port.