TL;DR Extract markers timestamps from Ableton Live .als project files into .cue files to generate podcast chapters with als2cue.
I’ve been recording and publishing podcasts for almost 10 years, and for most of the last decade I’ve been using Ableton Live to record and edit them. I was already familiar with Live from my “deejay period”, when I approached EDM music production, so it felt natural to keep using the tool I already knew.
The rise of podcast chapters
In the last few years, adding chapters to podcast files has become mainstream. It is very handy for listeners to jump around within an episode to reach the section they’re interested in. Heck, I even added automatic chapter listings to the CMS I developed for my podcast network (see an example in this episode, look at the “Capitoli” section).
But while it is great for listeners, the same cannot be said for podcasters. It requires significant effort to place and name chapters by hand, and I needed to automate the process a bit to make it doable without investing too much time in it.
Ableton Live Markers Locators
Ableton Live includes a great feature, Locators, to help mark sections of an arrangement. I add them while recording to mark roughly when we changed topics, then during editing I fine tune their location.

The thing is, when you export an .aiff file from Live, you don’t get the position of each marker in the file’s metadata like you do in Logic Pro, and my mp3 encoding app of choice, Forecast, cannot automatically insert chapter markers in the .mp3 file.
Extracting Locators from .als project files
Digging around, I found out that Ableton Live’s .als project files are basically just zipped xml files.
I then wrote a Python script that takes the .als file as input, and spits out a .cue file containing all the timestamps. Why a .cue file, you ask? That’s because Podcast Chapters, an amazing Mac app by Fredrik Björeman, supports .cue files to create chapters, which can then be named easily through its GUI.
It has worked great for me for more than a year, but it is not really user friendly.
My brother needed to edit an episode of another podcast, and it was just too cumbersome to have him run the Python script, so I decided to build a really simple web interface around my script: als2cue_web was born.
als2cue_web, who dis?
The web app is available for everyone to use at als2cue.lucatnt.com, it just asks you to upload a .als and returns a .cue file with each locator’s timestamp.
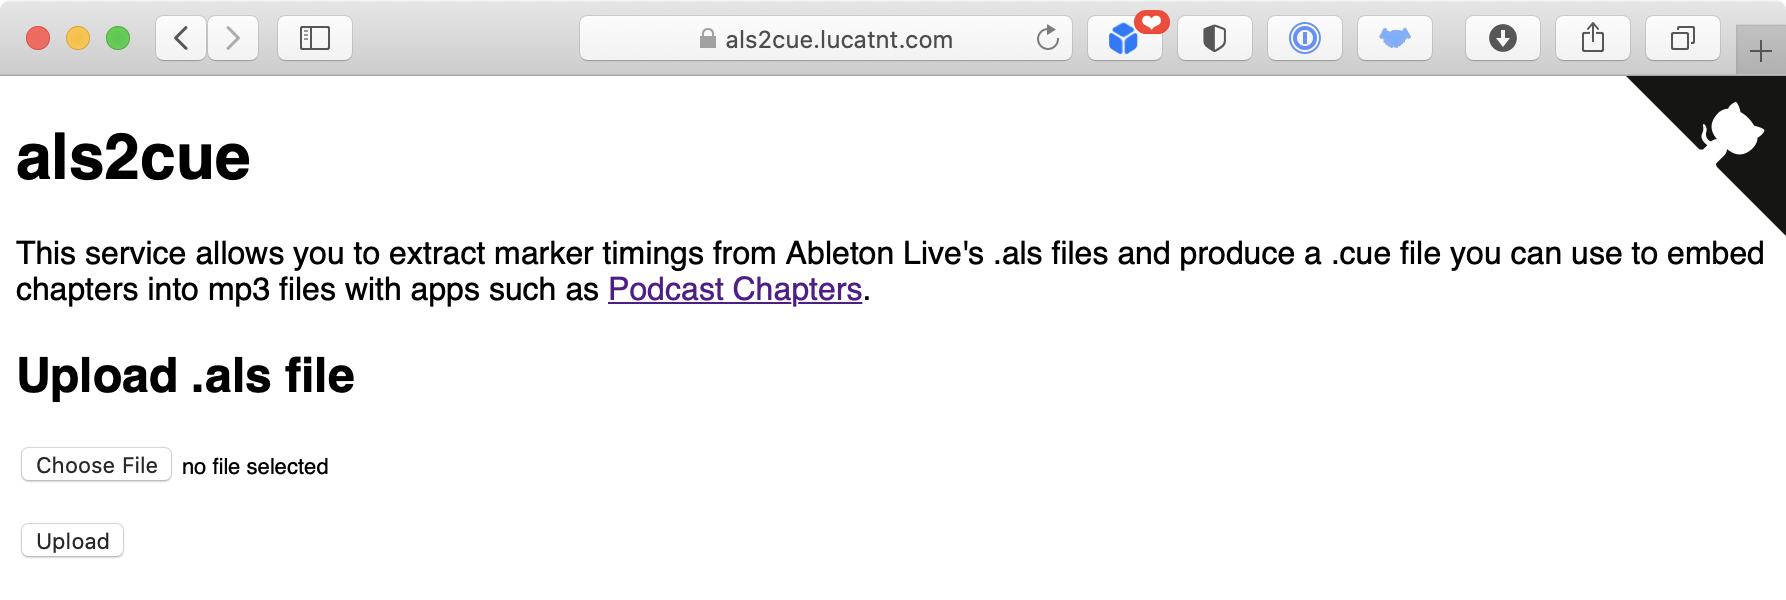
It is open source, and thus can be easily self hosted. It is available from my Github repo (pull requests welcome!) and as a ready-to-use Docker image, lucatnt/als2cue_web, you just need to expose port 80 of the container to a local port.

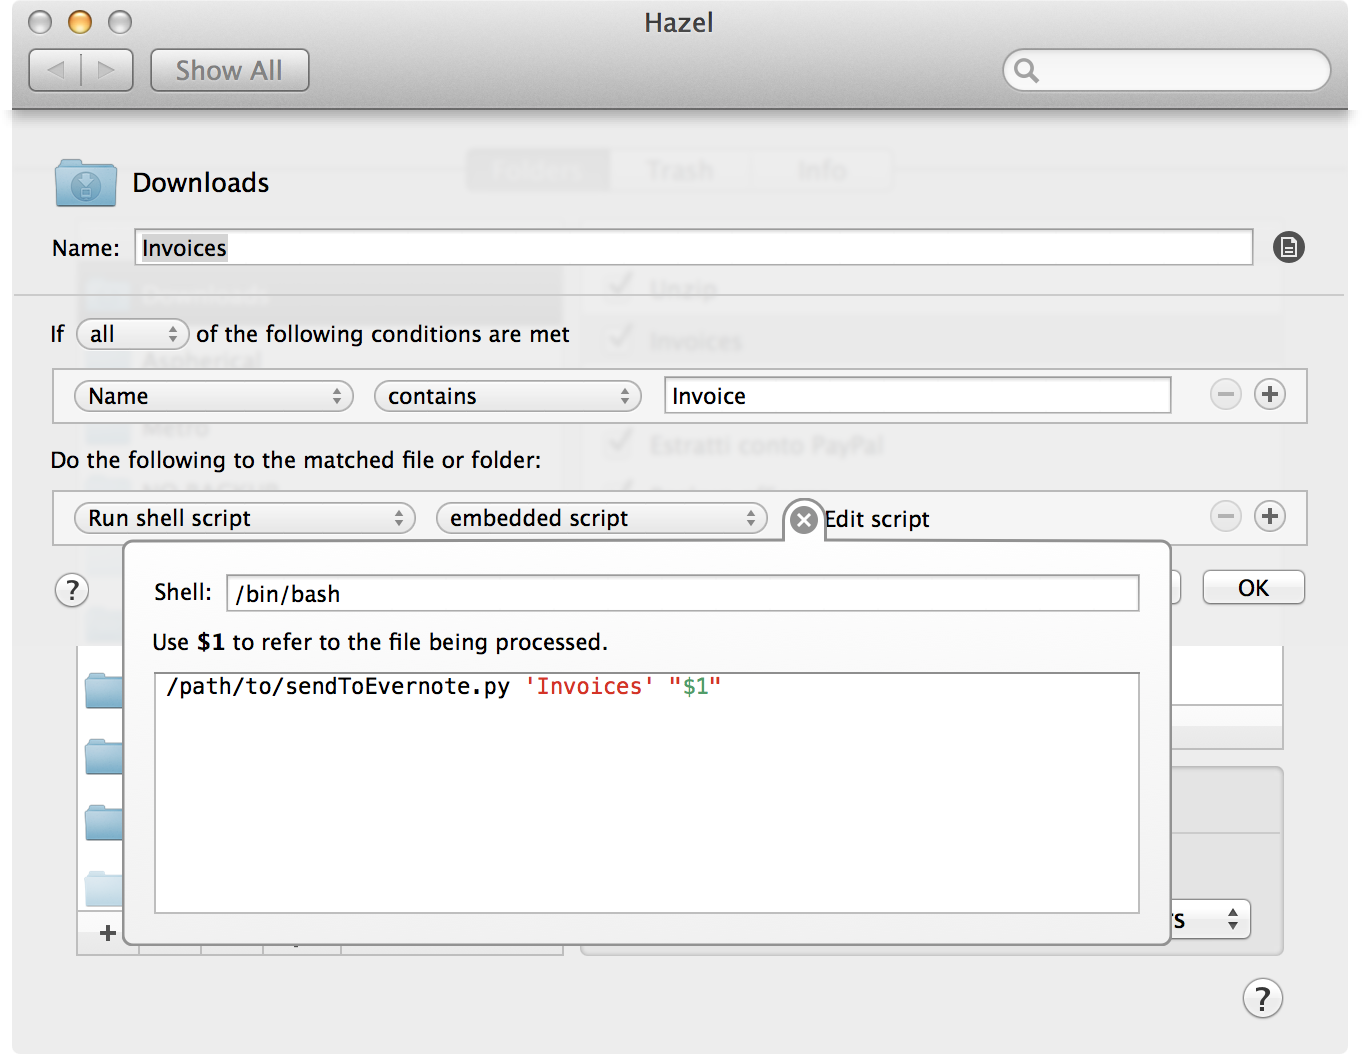
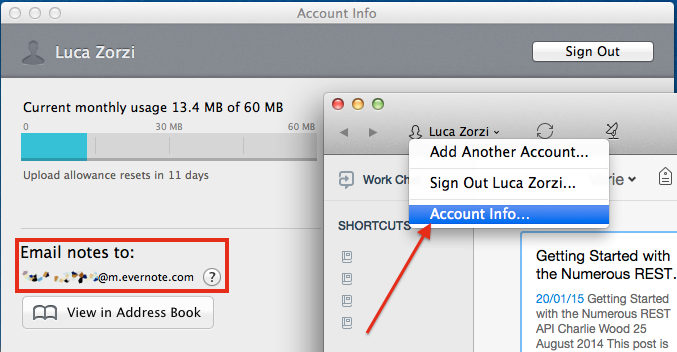 I called it sendToEvernote. It’s a Python script that mails the files you want to send to Evernote to the personal address every Evernote user gets after signing up. You can find yours in the “Account Info” section of the app, and you should make sure you keep it secret, otherwise you’re likely to get random junk in your notebooks.