Categories
Miscellanea

Podcast chapters and Ableton Live

TL;DR Extract markers timestamps from Ableton Live .als project files into .cue files to generate podcast chapters with als2cue.

I’ve been recording and publishing podcasts for almost 10 years, and for most of the last decade I’ve been using Ableton Live to record and edit them. I was already familiar with Live from my “deejay period”, when I approached EDM music production, so it felt natural to keep using the tool I already knew.

The rise of podcast chapters

In the last few years, adding chapters to podcast files has become mainstream. It is very handy for listeners to jump around within an episode to reach the section they’re interested in. Heck, I even added automatic chapter listings to the CMS I developed for my podcast network (see an example in this episode, look at the “Capitoli” section).

But while it is great for listeners, the same cannot be said for podcasters. It requires significant effort to place and name chapters by hand, and I needed to automate the process a bit to make it doable without investing too much time in it.

Ableton Live Markers Locators

Ableton Live includes a great feature, Locators, to help mark sections of an arrangement. I add them while recording to mark roughly when we changed topics, then during editing I fine tune their location.
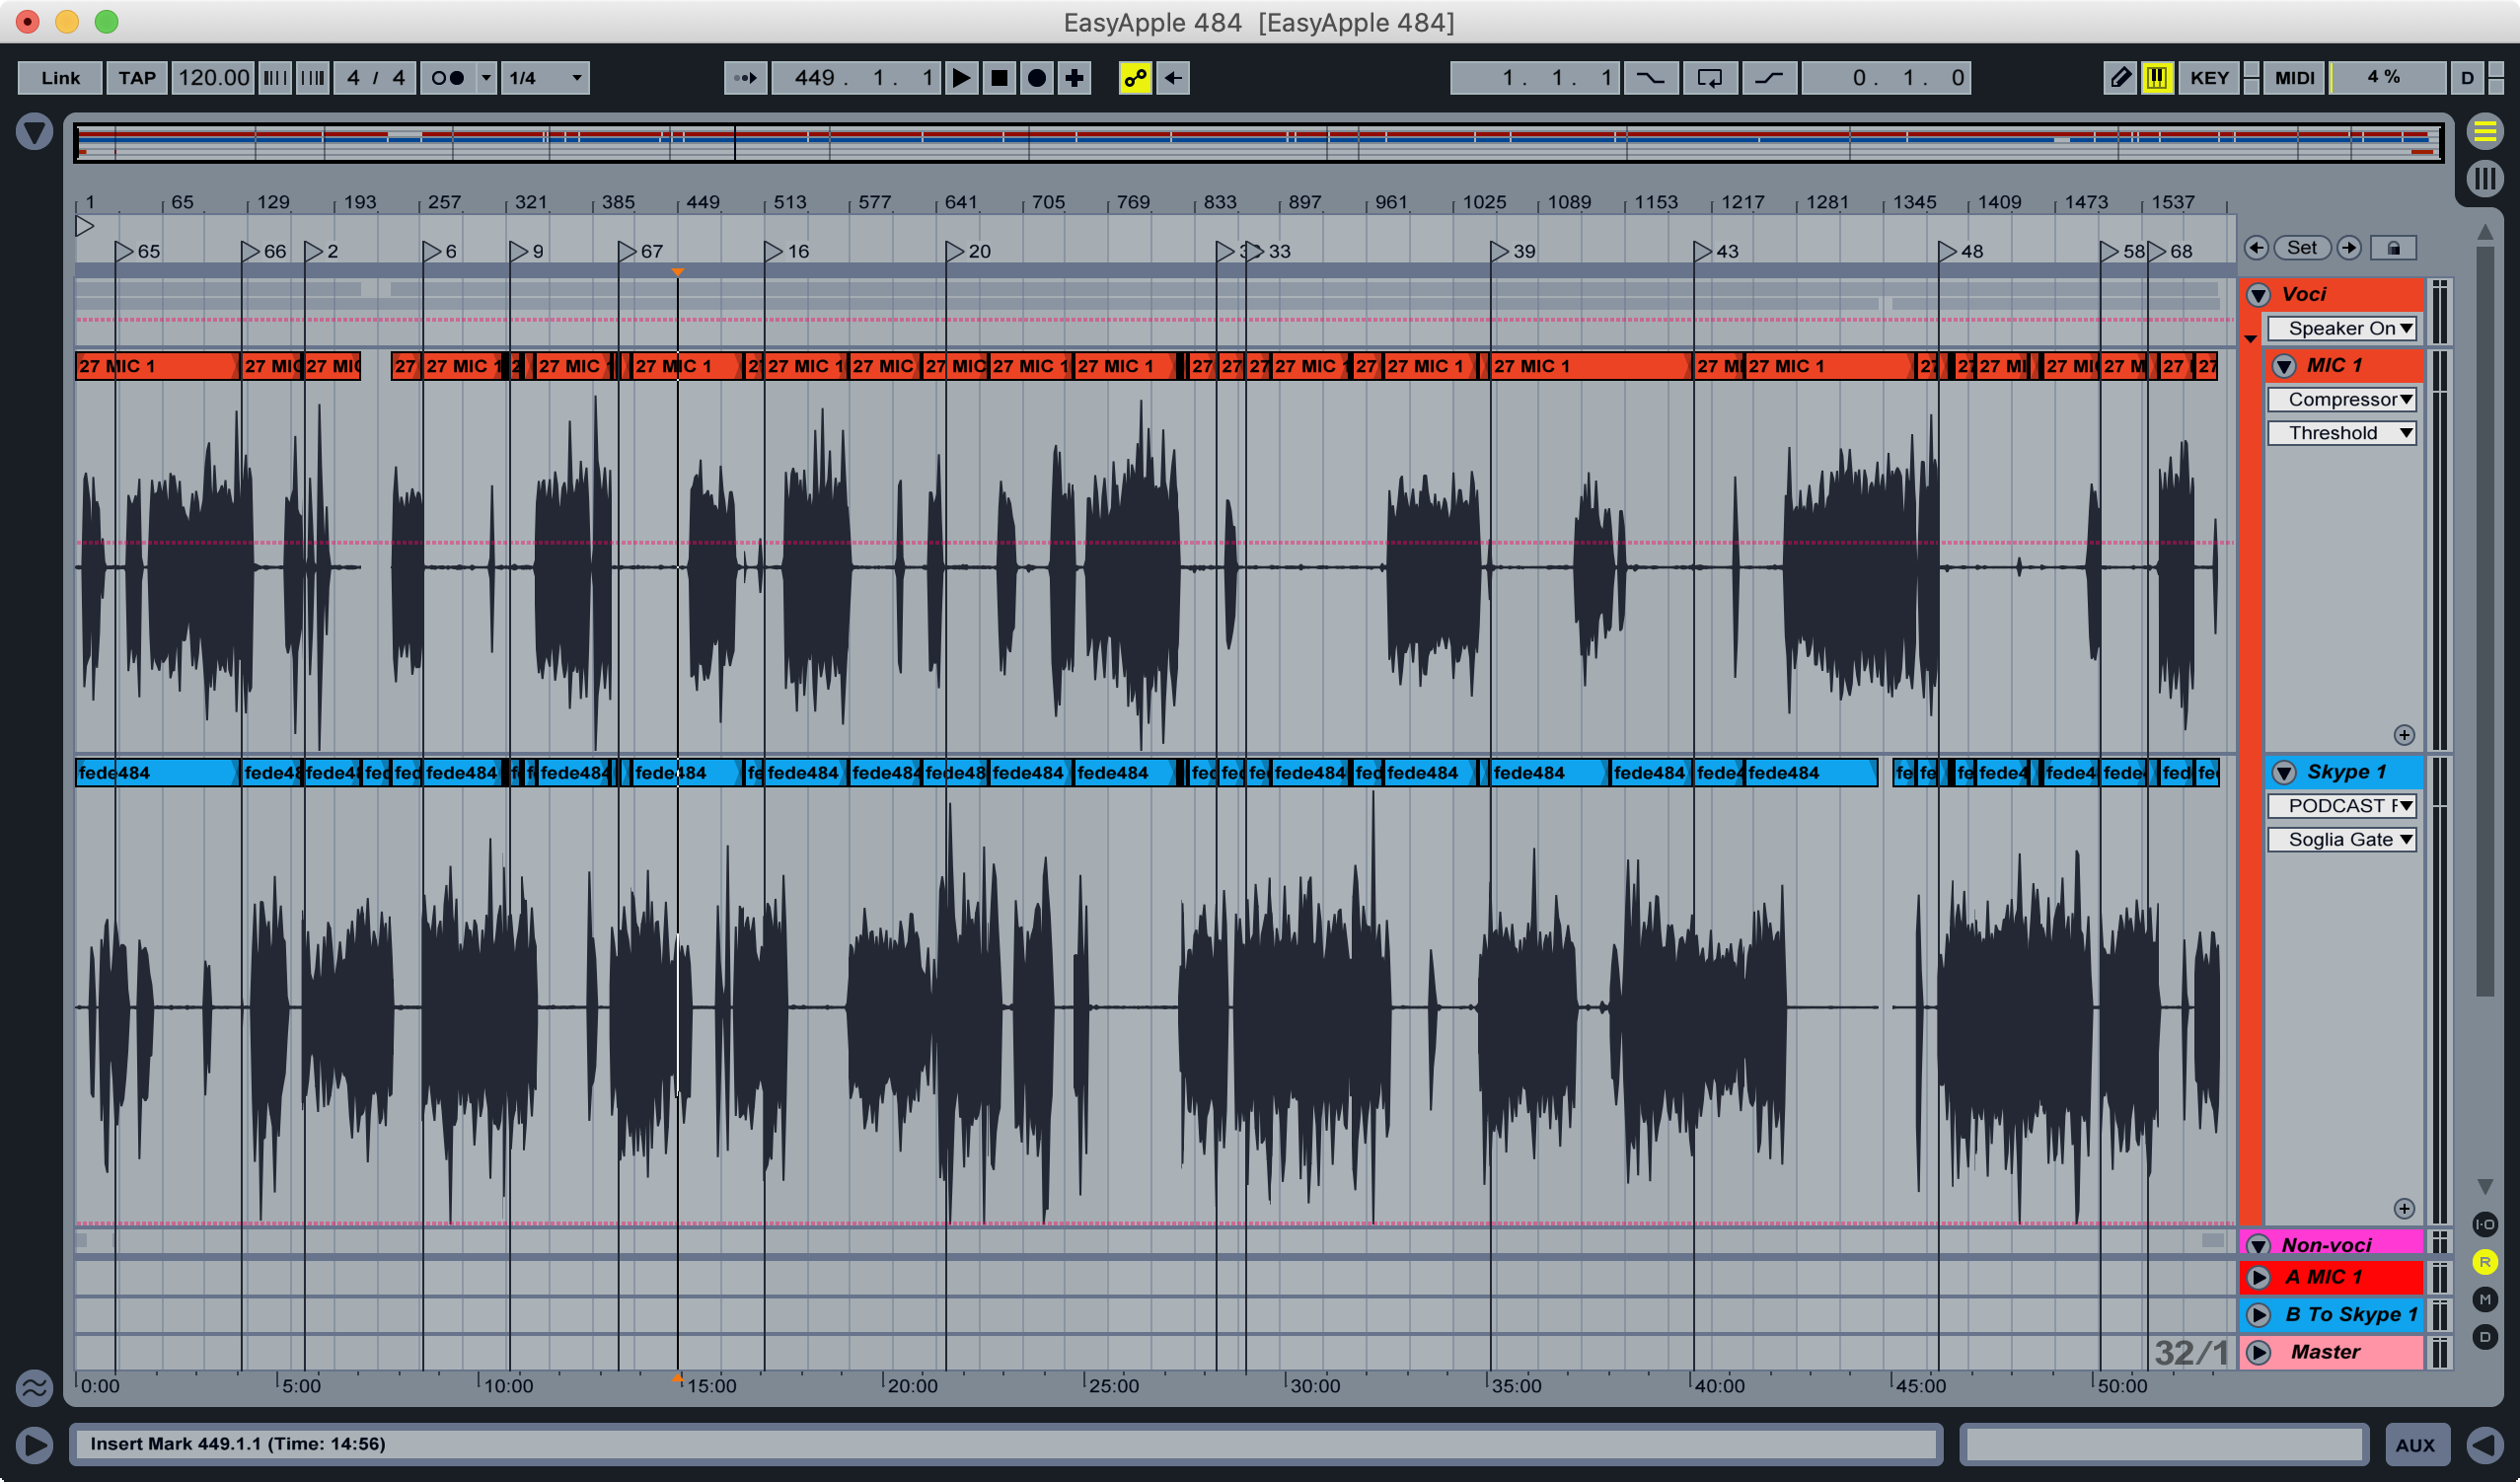
Screenshot of Ableton Live project with many locators

The thing is, when you export an .aiff file from Live, you don’t get the position of each marker in the file’s metadata like you do in Logic Pro, and my mp3 encoding app of choice, Forecast, cannot automatically insert chapter markers in the .mp3 file.

Extracting Locators from .als project files

Digging around, I found out that Ableton Live’s .als project files are basically just zipped xml files.

I then wrote a Python script that takes the .als file as input, and spits out a .cue file containing all the timestamps. Why a .cue file, you ask? That’s because Podcast Chapters, an amazing Mac app by Fredrik Björeman, supports .cue files to create chapters, which can then be named easily through its GUI.

It has worked great for me for more than a year, but it is not really user friendly.

My brother needed to edit an episode of another podcast, and it was just too cumbersome to have him run the Python script, so I decided to build a really simple web interface around my script: als2cue_web was born.

als2cue_web, who dis?

The web app is available for everyone to use at als2cue.lucatnt.com, it just asks you to upload a .als and returns a .cue file with each locator’s timestamp.
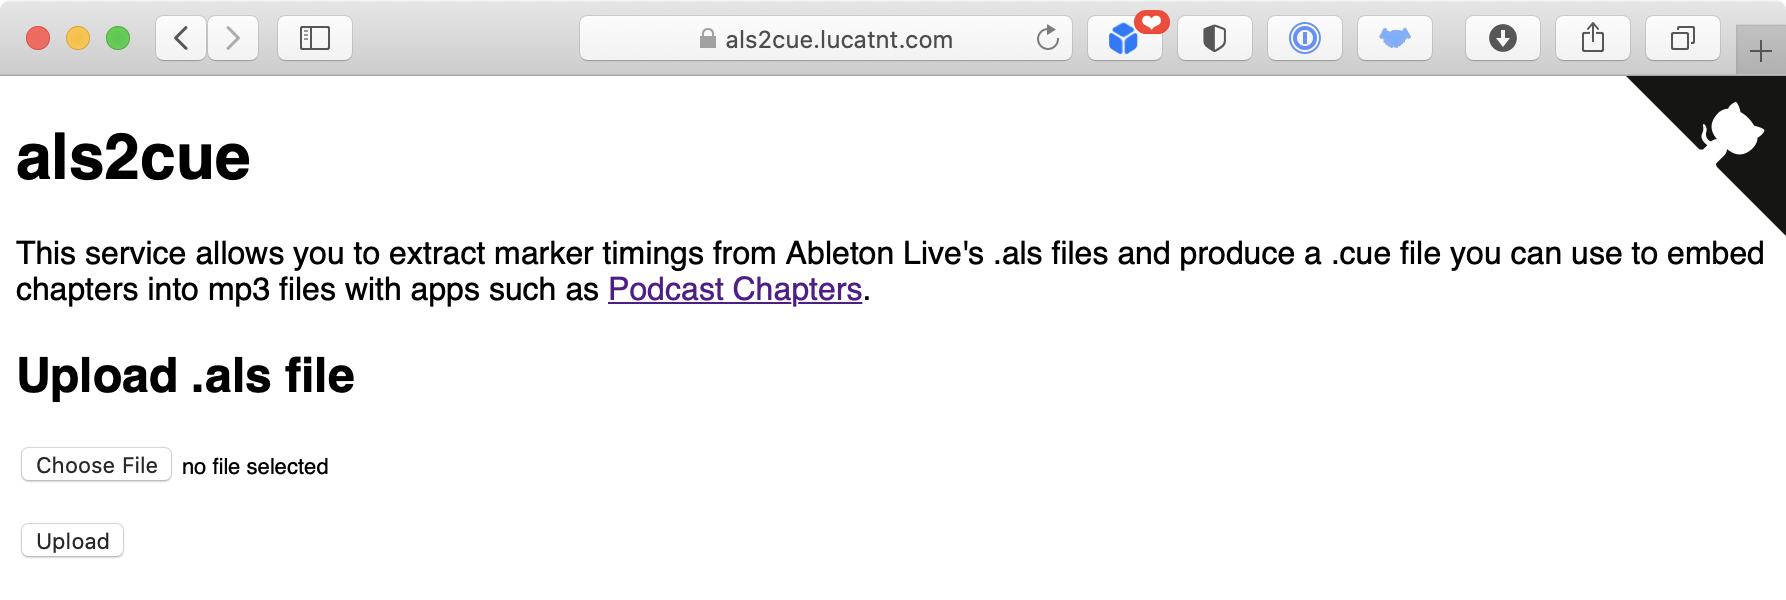
Screenshot of als2cue_web
als2cue_web’s sophisticated, hand-crafted interface in all its glory

It is open source, and thus can be easily self hosted. It is available from my Github repo (pull requests welcome!) and as a ready-to-use Docker image, lucatnt/als2cue_web, you just need to expose port 80 of the container to a local port.

Categories
Mac

Recover Ableton Live’s recording after a crash

Last night, I was recording a podcast using Ableton Live as usual, and my Mac kindly decided that it was time for a kernel panic. This left me with a few unusable .aiff files, that couldn’t be opened in Live, in QuickLook or any other app.

CorruptedAIFF

It looked like I was screwed. Enter Audacity, one of the ugliest applications available for OS X. It has a great feature: it can open raw PCM data, and it was able to successfully recover the whole recording. You just have to click on File/Import/Raw Data and select the corrupted AIFF file. A window like this will pop up:

AudacityRawSettings

You’ll have to adjust some settings to match Live’s. I used 44.1 kHz 16 bit mono, but make sure to check your Ableton recording settings to get yours. Don’t worry if you set them wrong, it won’t touch your original file, it will simply not play correctly in Audacity.

Once you have successfully imported your track, you can export it from Audacity in just about any format you might need.

Categories
Mac

Record multi-track Skype group call on OS X

A friend of mine and I host a weekly podcast and, as it often happens, we speak with our guests via Skype. For a while we had everyone record his own audio, since we wanted to have a separate track for each person in order to get the best possible audio quality. But that was inconvenient, both for our guest and for us, as we had to wait everyone to send us his audio before mixing and editing the episode. Recording Skype’s group call in a conventional way wasn’t a better solution. We’d only have two separate tracks: mine and everybody else’s, This is fine if there is only one person other than me, but it’s not with more guests.
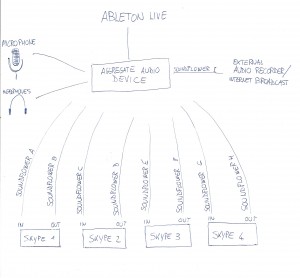
So I started to think on possible solutions, and the best one that came to my mind was to have a separate instance of Skype running for each guest (I’ll explain how to do this later on) and use Ableton Live to record each track and to manage the audio routing.

Ableton Live is quite expensive, though, and if you don’t already have some experience with it that justifies purchasing a license, I’d advise you to check out snkl’s post that explains in detail how to achieve the same result with a much cheaper (but still great) app: Rogue Amoeba’s Audio Hijack 3.

My awesome hand-drawn scheme

To manage the audio, we need some sort of virtual audio cables to connect Skype to Ableton Live. The best tool is SoundFlower, so head over to their site, download and install it. However, it is not ready for our purpose right out of the box: we need 2 “virtual audio cables” for each Skype instance, and Soundflower only ships with 2 of them enabled by default (and only one of which, the 2 channel one, is suited for our needs). I managed to edit Soundflower’s plist file to get more.