First of all, a disclaimer: I use this setup just as a secondary backup, I do not recommend you rely on USB drives as storage media for your FreeNAS server.
Overview
I have a few spare 2 TB drives that used to be in my homeserver, and I wanted to connect them to my FreeNAS every few weeks to store some backups on them, then disconnect them and put them in a drawer.

Preparing the USB hard drive
If your drives are not brand new, chances are you already have some data on them, so you’ll need to wipe them first. To do so, connect your drives to FreeNAS, login to the webinterface, go to the Storage tab, click on “View Disks”, select the correct one from the list, then click on the “Wipe” button on the bottom of the screen.
Everything will turn red now. That’s because you’re doing something potentially dangerous. Make sure you really select the correct drive, otherwise you might destroy all of your data.
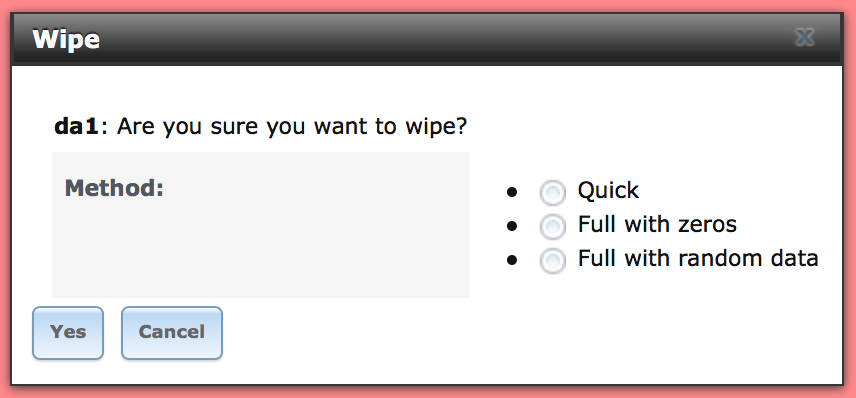
A Quick wipe is usually enough. Select that and proceed.
Once the wipe is completed, you can turn the disk into a Volume you can use on FreeNAS, just like your main one(s). Head over to the Storage tab, click on the “Volume Manager” button. You will see your newly wiped disk there, give it a volume name, tick the “Encryption” checkbox if you’d like, then click on “Add Volume”. I’ll call mine “ColdStorage” for the purpose of this tutorial.
Do NOT select any “Volume to extend”. That would mean you’d be adding a single (USB!) hard drive striped to your main pool, and that drive would become the single point of failure for all the data in that pool.
After the disk has been initialized, you can start adding datasets, clone other ones, setup network sharing, whatever.
Disconnecting the USB drive
Once you’re done with it, you will want to disconnect your USB drive to store it somewhere. To do so, once again go to the Storage Tab, select your pool from the list (ColdStorage in this example), then click on the “Detach Volume” button. You will only see this button if you select the pool, while if you select the dataset with the same name you will get a different set of buttons.
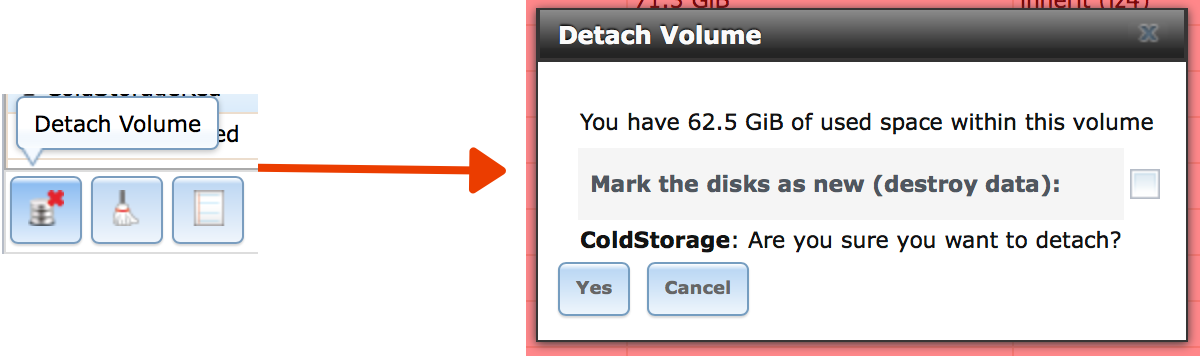
I’m not sure that I have to point that out, but let’s do it anyway: do NOT select “Mark the disks as new (destroy data)”. Once the pool has been detached, you can disconnect the USB drive.
Reconnecting the USB drive
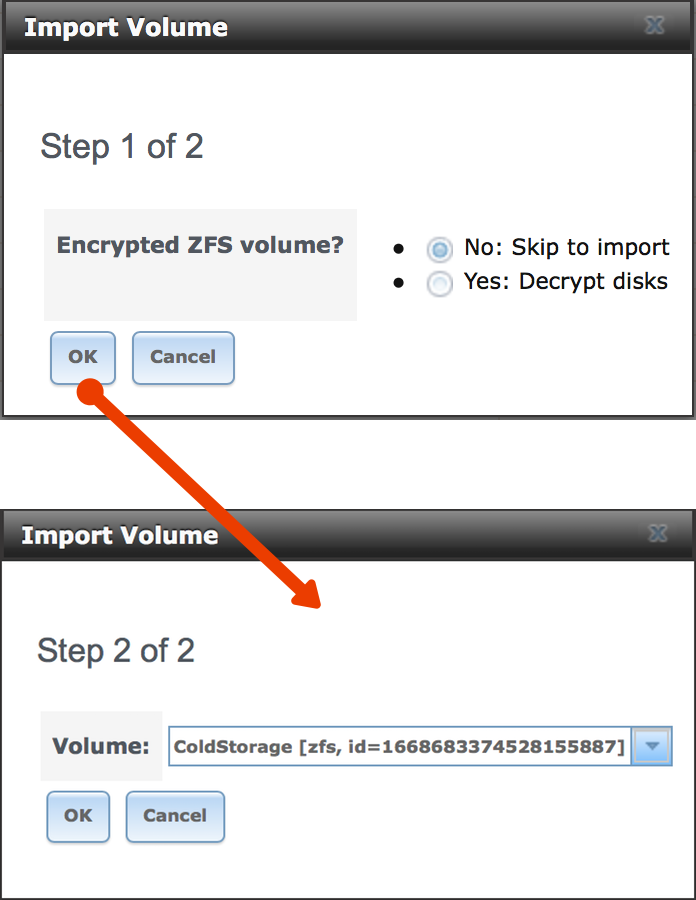
For the thousandth time, go back to your trusty Storage tab, then click on the “Import Volume” button. A box will appear, select wether you have an encrypted volume or not, then click OK. FreeNAS will stop a few seconds to reflect on the good it’s made in its life, then it will present you a dropdown from which you’ll be able to select your USB volume. Click OK and it will be once again available in FreeNAS.
9 replies on “How to use a USB drive with FreeNAS”
Just wanted to drop a note to say thanks for this! This is exactly what I needed to do and this how-to works like a charm. I was surprised this doesn’t seem to be more widely discussed/done (do home/SOHO FreeNASers just not back up their stuff?), so again, much appreciated. As an aside, have you run into any snags with this procedure?
Thanks!
No problems at all! It even survived when I accidentally removed the wrong power plug and disconnected the USB drive while the pool was imported in FreeNAS (it was not being actively written to, but that’s not the point 😉).
Exact same remark : This tuto is perfect and I’m surprised not to have find it in multiple locations.
Thanks Luca.
I’m glad you found it useful, Pierre! 👍🏻
Great howto! This helped me a ton! Do you have a howto on recommended settings for a Replication Task for auto backup to USB? And then swapping after a week or two to a second USB to store the first offsite?
hi,
Im a newbie to Freenas and have just setup a FreeNAS-11.2-U4.1 server watching youtube videos. Had a spare pc lying around with 3 x 1TB Hdd and got 2gb memory. Have installed Freenas and setup shares and selected Raid1 striped to utilize all 3 disks for maximum space.
It is recommended to have minimum 8gb memory which i have to upgrade to, but currently the works seems to be getting done.
I need help in extending the space and have got 1TB hdd to add. Can i extend the volume by adding only one disk or it needs to be always equal to the number of installed disks ( i.e 3 installed ) Also i need to backup my data to an external usb hdd for which i will follow the method given by Luca.
Thnx
Hi,
I think you mean you use all 3 hard disks in raid0, so you get the sum of the capacity of the drives (but if one of them dies then you lose *all* of your data).
In raid0, you can easily add an additional hard drive to get the extra spaces. Again, you risk losing all your data if one of the disks dies.
That’s not so easy with other configurations (mirroring and RAIDZ) because if you add an additional drive you’d be striping it to those you had originally. Say you have a 3-disk RAIDZ1. You get the capacity of 2 disks. If you add a fourth disk you’ll gain that disks’ worth of capacity. But if it dies, you loose all of your data. If any of the other 3 dies, you still have your data due to the redundancy of RAIDZ.
Oh, great! Yesterday, I played several hours around to mount the USB-Device for offline-Backups with no success… Thank you very much for this tutorial!
Thank’s!
Hi,
Very informative.
I am buying an external HDD 14TB (connected through USB) to connect it to my old laptop and use it with FreeNAS.
Would this external HDD (USB) work?!
Thanknyoiy