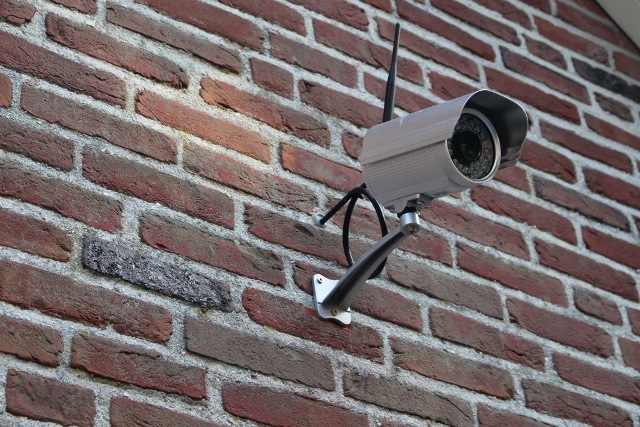
I’ve had a couple of Foscam FI9805W H264 IP cameras for almost a year, and I’ve been very happy with them: the 1280×960 image is sharp and clear both during the day and during the night, and their firmware has been very reliable.
One thing I wanted, though, was having the footage from the last 1-7 days available at any time. The onboard firmware allows to record to an FTP server, but this was suboptimal, there was no easy way to define the clip length and was pretty clunky to set up.
I started digging around, and I found that ffmpeg could easily record the RTSP stream from the cameras. In the cameras’ settings you can choose the video bitrate, up to 4 Mbit. I found that the optimal bitrate is 2 Mbit: going to 4 only meant that the files were twice the size without any noticeable improvement of the quality.
This results in approximately 15 Gb per day per camera of video files. This is way lower than 2 Mbit average, and that’s due to the fact that during the night, with the IR lights on, the image turns to black and white and the bitrate lowers to about half of the usual value.
I came up with a complete solution which is made of the following parts:
- Two Foscam FI9805W IP cameras, but any reasonable number of cams can be used
- My home server, running Debian, which is on 24/7
- A cronjob that fires up ffmpeg every 15 minutes to record 15 minutes clips. This makes searching much easier than having to deal with giant multi-hour recordings.
- A cronjob that triggers everyday at midnight, which converts recordings older than 24 hours to a much smaller low-framerate and low-quality files to reduce disk usage
- A cronjob that triggers everyday at 4 am to purge older recordings.
Recording video
This is the easy part. I just use this script, which I named recordCam.sh:
You’ll have to edit the IP address, port number and login credentials to suit your needs and add/remove additional lines at the bottom to match the number of cameras you need to record. Also, set your own paths.
You need to add a cronjob to your system, to fire this script every 15 minutes:
*/15 * * * * /path/to/recordCam.sh
Quick tip: in the settings of each of your cameras, add a “Visitor” type user for esclusive use in this script, so that if somebody finds its password (which as you can see is saved in the clear) he cannot mess up with your cameras’ settings.
Converting to low-quality for archival
I decided I don’t need to save full-quality recordings of every single second, so my compromise was to heavily re-compress videos older than 24 hours (1440 minutes).
After lots of tests, I chose to reduce the framerate from 30 to 5 fps and set the bitrate to 100 kbits. That’s a really low bitrate for 960p videos, but since the footage is mostly static the quality is still half decent. The space usage is about 1 GB per day per camera.
The script I use, convertVideo.sh, is this:
It takes the file you pass to it, creates the appropriate folder structure and encodes it, then it deletes the original file.
This is the cronjob that launches the script:
0 0 * * * find /path/to/surveillance/folder/video/ -mmin +1440 -size +10000k -exec /path/to/convertVideo.sh {} \;
I use the find command to get the videos that need to be converted, and it looks for files over 10 megabytes that were last modified more than 1440 minutes ago. Of course, you are free to change these parameters as you wish.
Pruning old videos
Even with this heavy compression, the files add up quickly, so I decided it’s not worth keeping videos older than a week.
So, here is the cronjob to do the job (pun intended):
0 4 * * * find /path/to/surveillance/folder/archive -mindepth 3 -type d -mtime +5 -exec rm -r {} \;
It looks into the archive folders, looking for directories, as each day has its own, older than 5 days (that’s a weird side effect of confusing date math: you’ll end up having 7 days worth of recordings, plus the high quality last day).
The -mindepth 3 parameter was required due to the folder structure I chose, which is: archive/camXX/YYYY-MM/DD/*.mp4
- At the first depth level there are the folders of each camera. Their last-modified date changes every time you add or remove a file/foder inside it, so this actually happens the 1st of evert month, when the month’s folder is created.
- At the second level, there are the YYYY-MM folders, so we shouldn’t touch them
- Finally, at the third level there are our “day” folders, which we want to delete when they get too old.
Then a final cronjob that removes old and empty month directories
1 4 * * * find /path/to/surveillance/folder/archive -mindepth 2 -maxdepth 2 -type d -empty -exec rmdir {} \;
You’re done
Yes. That’s it. I admit it’s not very straightforward, but it does work once all the pieces are in place. The nice thing is that all the mp4 files, both those saved directly from the cameras and the re-encoded ones play nicely on my iOS devices (I presume Android as well, but I don’t have a device handy to test), so I can just VPN back home to retrive a recording, should I need to.
If you have any questions feel free to leave a comment below, I’ll try to reply to everyone.
48 replies on “Record and archive video from IP cameras”
Hey there. That is a very nice guide. Just what I’m looking for, but I can’t make it work.
Would it be possible to make a detailed guide, about how to make this work.
Which OS should I install. Which one is the best for this project?
Kind Regards.
Michael Pedersen
Hi Michael,
I use Debian, but any Linux distro you’re comfortable with will do, the only requirement is to install ffmpeg.
A detailed guide would take me hours to write, and I really don’t have that much spare time at the moment.
A quick suggestion: save the provided script in the same folder, edit them as needed (mostly changing IP addresses, login credentials and paths), make them executable (
chmod +x /path/to/the/script.sh), add the required cronjobs, like the example ones I posted, by runningcrontab -e, pasting the provided line, and saving the file.That should be it, I hope it helps.
Hi
I am currently working on ffmpeg and RTSP camera’s as well, and I was wondering:
Why don’t you let the camera’s send a second stream in low quality (some camera’s can do this) and you record this stream as well, but then as a (low) quality stream. After a week, when you want to delete the high quality streams, all it takes is a simple delete command. The low quality streams are still in your archive.
You can even go as far to let ffmpeg create static jpegs every 2-3 seconds, and safe them for eternally.
The important thing is that you want the system work once, and not let it crunch your CPU by constantly recoding olders files while you could have saved it in low quality the first time, and let your camera do the hard word.
Hi Edwin,
you’re absolutely right, that would be a nice solution.
However, even using the camera’s secondary stream the output file is quite big, around 4 times the size I get for my low-quality “long term” storage.
It’s true, though, that hard drive space is quite cheap these days, so I might think about switching to your solution and save some power in the future.
Thank you for your comment!
Just a tip for anyone using a low end camera like the ELP 720 (http://goo.gl/qgpN2s). The camera only supports a single connection to an rtsp stream, so many times the ffmpeg process started via cron starts before the previous process ends, resulting in a zero byte file.
Luckily the solution is easy. Add killall -INT ffmpeg to the top of the recordCam.sh script. The -INT switch simulates a user interrupt (ctrl-c), and will allow ffmpeg to cleanly exit and write a usable file.
That’s a great tip, thanks!
Instead of having 2 jobs to delete files and folders, you can have one. On the first “find” command that finds folders older than 5 days, change the -exec command to be “rm -rf”. It will remove the folder and all files within it at the same time. Nice scripts!
Hi Bill!
The first find gets all the files that need to be converted, and the conversion script takes care of deleting the originals once it’s done, so I need the second one to delete the empty directories that were left behind.
I can’t rm -rf in the first one because there might still be videos to be converted in the folders.
Hi Luca,
Thank you for this handy writing. I “cloned” it with some minor changes. It works okey except for one thing. When the prunning cronjob is started @ 4:00 in the morning everyday the recordCam.sh quites after saving 309 bytes. I am trying hard to find out what causes this phenomena but I don’t have a clue. It would be nice to know every single 15 minutes are stored properly but unfortunately there is a whole 15 minutes block missing every day.
Could you or someone suggest something on how to sort it out?
Thank you,
Csaba
Hi Csaba,
I’ve double checked my setup and I don’t loose any video, anyway to help diagnose the source of your issue I’d suggest you to save a different log file for each 15-minute chuck by editing the last lines of recordCam replacing
/tmp/cam01.logwith/tmp/cam01-$name.logor something like thatHi,
Very good idea, thanks. Meanwhile I’ve found out that there are 3 RTP missed packages in every log file. I am using avconv instead of ffmpeg for I couldn’t get it work under Raspbian Jessie. I don’t think it is the origin of the problem. As far as I know avconv and ffmpeg are very similar in syntax, aren’t they.
Should there be any development in this issue, I will share it with U and others.
Hi Luca, thanks for sharing your scripts, saved me a lot of time figuring it all out by myself!
I’m glad it helped!
Hey Luca,
your guide is very nice. I use the same system to record my house and the garden.
Unfortunately, I have a problem with the framerate configuration. When I use your command (ffmpeg -i rtsp://username:[email protected]:80/videoMain -r 30 -vcodec copy -an -t 900 $RECpath/cam01/$name.mp4 /dev/null 2>/tmp/cam01.log &) with avconv, the framerate doesn’t change if I set it higher or lower. It keep a value between 30 and 35 frames.
Did the parameter worked in your system?
Hi Kleriger,
Actually that parameter never really worked for me either, I think ffmpeg just follows the source’s fps rate.
I think if codec is “copy” then you get a stream copy and that means the input stream frame rate, size and bitrate. To change frame rate you need to specify a codec.
Hi Mark,
you’re right. If I specify a codec, the framerate changes to the new value, but the CPU-load rises over 100%, because my raspberry pi creates a new video stream :/
Do you know a trick to copy the stream but drop frames, e.g. drop every second frame (maybe drop down every second UDP frame?).
I don’t think that’s possibile: h264, the codec used in most of these IP cameras doesn’t compress each frame separately from the others. It does store a full frame every few seconds, then saves only the differences between that and subsequent ones, so you can not just throw away some of the data, and even if it were possibile to only keep these so-called key frames I don’t think you’d save much space.
The only option is to reencode, which takes a lot of CPU power.
it’s exactly what I looking for, many thanks bro
but how to get the audio?
and there is some artefacts on my video, can I fix this?
Getting audio is really easy: just replace
-anin the ffmpeg command with-acodec copyThis will copy the audio as-is from the cameras. You might want to fiddle with different codecs if you need to save space.
As for the artefacts, I’m afraid there’s nothing we can do about that, it’s due to the cameras themselves.
why did you go with “-t 900” instead of “-segment_time 900”?
To be honest I didn’t know that option existed, but having looked at it I’d say it is pretty convenient, but it looks like it can only output files with a progressive filename, without explicitly containing the date and time of the recording.
to add date and time to the segment file names use
-segment_atclocktime 1 -strftime 1 “cam1-%Y-%m-%d_%H-%M-%S.mp4”
Thanks for the tip!
Hello
This looks good, i have yet to try it, but i wonder
What happens if the connection lost during the 15 minute period that the ffmpeg is running?
If the camera comes back, will the entire 15 minute session be lost, or will ffmpeg wait until connection comes back and continue the save of the stream?
If the connection drops ffmpeg will time out and save what it has (the file sometimes will be corrupted, but 95% of the times VLC will be able to play it anyway).
Assuming the camera is back online, the next 15-minutes chunk will be unaffected.
Does this grab the audio as well or just the video. Your information has been a real time saver. Thanks for sharing!!!
Only the video, but you just have to replace
-anwith-acodec copy where it appears in my scripts.thx for the idea!. Regarding the previous comment:
In that case just after a cronjob has been started and than the connection to cam will be lost (so in 1st minute of the cronjob), you will have no recordings for 14 minutes i.e. until the next cron starts.
Why not using a “while true” loop in the script. Like this (not tested):
only “consession” you have to “accept is that cam01/cam02 has been changed to cam1/cam2 etc
For others: this is working only if the urls of your cams consists of the ips where the last digit will be increased by 1 for each cam, like f.i.:
192.168.1.201
192.168.1.202
192.168.1.203 etc
Besides my suggestion there is also the “timeout” parameter of ffmpeg, which – when set to a value of -1 – it acts like a server (listning) 😉
More here: http://ffmpeg.org/ffmpeg-protocols.html#rtsp
ffmpeg version 2.6.8 Copyright (c) 2000-2016 the FFmpeg developers
built with gcc 4.8.5 (GCC) 20150623 (Red Hat 4.8.5-4)
configuration: –prefix=/usr –bindir=/usr/bin –datadir=/usr/share/ffmpeg –incdir=/usr/include/ffmpeg –libdir=/usr/lib64 –mandir=/usr/share/man –arch=x86_64 –optflags=’-O2 -g -pipe -Wall -Wp,-D_FORTIFY_SOURCE=2 -fexceptions -fstack-protector-strong –param=ssp-buffer-size=4 -grecord-gcc-switches -m64 -mtune=generic’ –enable-bzlib –disable-crystalhd –enable-gnutls –enable-ladspa –enable-libass –enable-libcdio –enable-libdc1394 –enable-libfaac –enable-nonfree –enable-libfdk-aac –enable-nonfree –disable-indev=jack –enable-libfreetype –enable-libgsm –enable-libmp3lame –enable-openal –enable-libopenjpeg –enable-libopus –enable-libpulse –enable-libschroedinger –enable-libsoxr –enable-libspeex –enable-libtheora –enable-libvorbis –enable-libv4l2 –enable-libx264 –enable-libx265 –enable-libxvid –enable-x11grab –enable-avfilter –enable-avresample –enable-postproc –enable-pthreads –disable-static –enable-shared –enable-gpl –disable-debug –disable-stripping –shlibdir=/usr/lib64 –enable-runtime-cpudetect
libavutil 54. 20.100 / 54. 20.100
libavcodec 56. 26.100 / 56. 26.100
libavformat 56. 25.101 / 56. 25.101
libavdevice 56. 4.100 / 56. 4.100
libavfilter 5. 11.102 / 5. 11.102
libavresample 2. 1. 0 / 2. 1. 0
libswscale 3. 1.101 / 3. 1.101
libswresample 1. 1.100 / 1. 1.100
libpostproc 53. 3.100 / 53. 3.100
rtsp://admin:xxxxxxxx@ip:554/ch01.264?ptype=tcp: Invalid data found when processing input
I get this error and don`t know how to get rid of it. If you can help please respond.
I’m afraid your camera streams invalid data, sadly I don’t know what you could do to fix it 😟
Possibly you need to escape some special symbols in the link. If the link looks truncated then that is probably the case. You can test the link in VLC on your PC (open network stream) – if it works there then the link is fine
hi, sorry to ask
can I implement this into openwrt?
As long as you have enough storage and ffmpeg installed on your router, I think it should be possible
One liner:
avconv -i rtsp://@192.168.1.99:9002/Streaming/Channels/101/ -c copy -map 0 -f segment -segment_time 300 -segment_format mp4 “capture-%03d.mp4”
Great job and something am looking for…
am a noob and related question…
does a raspberry pi3 suffice to do the recording jobs from 3 ip cameras?? or i do need a linux desktop class machine for the cronjobs to properly execute..
Thanks
Hi,
as long as you grab each stream “as-is”, without recompressing it and skip the whole section about compressing the captured videos for longer term archival, I think a Raspberry Pi 3 will be more than adequate to do the job.
Only make sure the drive you’ll save the videos on is not the internal SD card, or you’ll kill it pretty quickly.
I’d just like to thank you for the clear and concise write-up. I’ve got a half dozen IP cams and wanted a lightweight solution for recording directly to a NAS, as I’d grown to hate the various pre-canned options (Zoneminder/Shinobi/Surveillance Station etc).
This implementation was perfect.
Cheers!
Glad you like it, Daniel!
nice post, im replacing my motioneye with this guide! thanks!
one question from me:
what tool or app are you using for streaming the clips to your mobile devices? cifs/smb
thanks in advance!
best regards Martin Nicolaisen from Denmark
Hi Martin!
I have nginx with directory listing enabled and pointing to the directories where I store my videos, and I just watch them in the browser whenever I need. If I’m not home, I use OpenVPN to access my LAN remotely and then use that same web page.
I had started developing a really simple iOS app that did the same thing (with the help of a couple PHP scripts that generated a JSON list of all the files), but ultimately it was a lot of effort for not much gain: while the nginx trick is inelegant it works quite well on all platforms.
Hi again,
spot on! i going to spin up a nginx and do the same! make so good sense have you working into motion detection? some of the camera, do have more advance features like linecrossing etc.
these scripts you have made, are excellent for 24/7 recording – but looking into alerting on linecrossing + object detection and trigger an alarm 🙂
so i only need to process pictures that are triggered by linecrossing. that should be possible 🙂
again thanks for the nice guide!
I haven’t looked into a solution for alerting, I only played a little bit with the camera’s built in system and I found it to be not very accurate (a lot of false positives), so I gave up.
For logging and speeding up things, I’d suggest
ffmpeg -hide_banner -loglevel panic -threads $(nproc) (…)
Very neat, just what I need.
Debian buster on a Raspberry Pi with a BIG attached disk
Thanks so much for this. I had been naively using motioneye to record continuously and the recompression was hammering the CPU and giving me a lousy frame rate.
This direct stream recording approach works so very much better. Thanks!
Great guide. Thanks